Wednesday, November 30, 2011

Christmas Configuration Class

Hi Bloggers! 
Come join me at Scrapbook Territory in Berkeley, California this Saturday.
I will be teaching a Christmas Configurations Class. 
Click here for more information.
After making the above Configuration Box for my class I had some leftover boxes 
and I couldn't let them go to waste. 
Sooo . . . . I made this mini "Wish" box. 

I hope all of you are looking in on "The 12 Tags of Christmas" with Tim Holtz. 
I know I can't wait to see them. The anticipation is building. 
Also check out Mario on twitter for the "BTS" behind the scenes. 

Thursday, November 24, 2011

Happy Thanksgiving!

Hi Bloggers! Happy Thanksgiving.
I hope you are all taking some time with friends and family. 
Here are a few shots from my backyard I took a few days ago, fall is in full swing. 
I love this time of year. 
Enjoy your day relaxing, creating, eating, being grateful..... 

Thursday, November 17, 2011

The Ranger Great Pumpkin Challenge!

Recently, I received a plain ol' craft pumpkin from Ranger and was asked to 
create a fall centerpieces using Ranger products. 
This is what the pumpkins looked like before:

Here is my finished project. It looks beautiful on my entry table and 
will be a great addition to my Thanksgiving table. 

Here is a list of the supplies I used.

Inkssentials Non-Stick Craft Sheet 
Inkssentials Ink Applicator Tool and Foam 
Jenni Bowlin Dabber Paint - Chicken Feed, Brown Sugar, Fountain Pen 
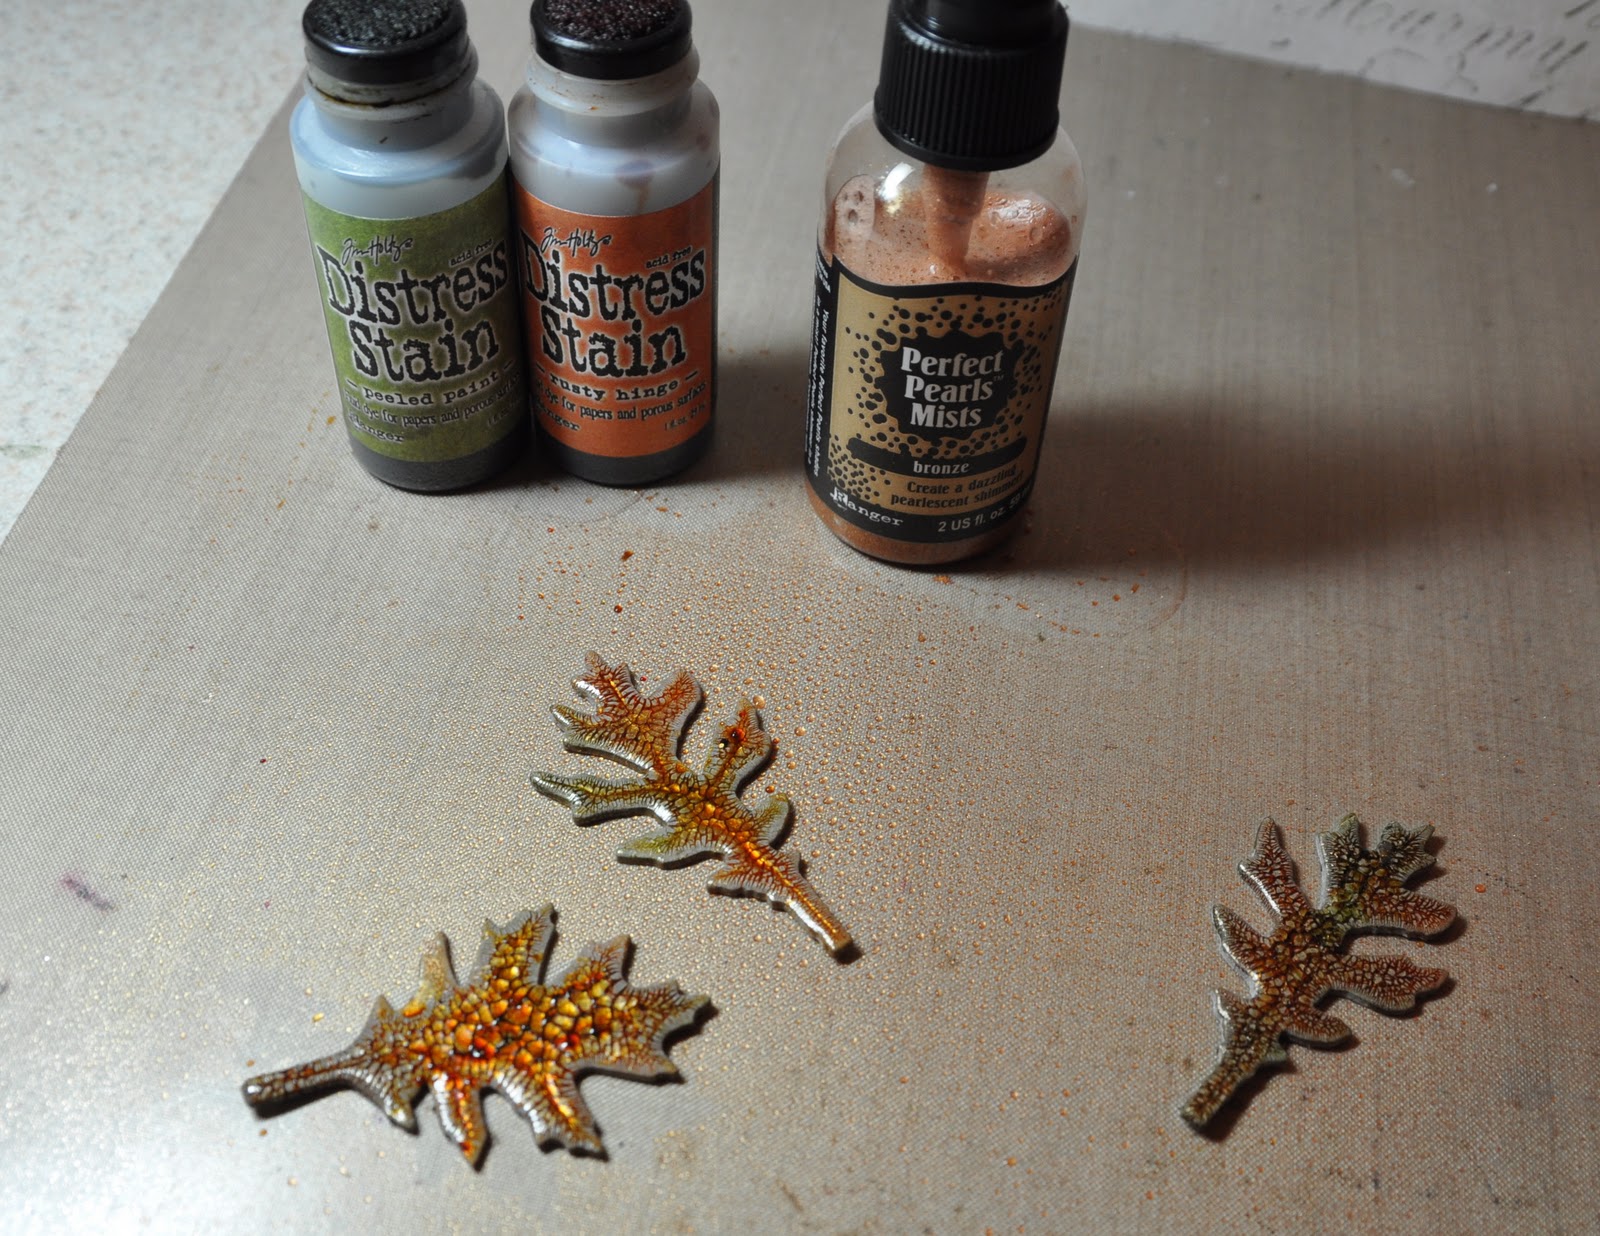
Distress Crackle Paint - Rock Candy 
Distress Stain - Rusty Hinge, Peeled Paint
Distress Ink - Brushed Corduroy 
Perfect Pearl Mist - Bronze 
Alterations by Sizzix - Tattered Leaves
Tim Holtz - Grunge Board and Grunge Blocks 
Tim Holtz Sanding Grip
Claudine Helmuth Matte Medium 
Jute Twine 

STEP BY STEP INSTRUCTIONS:
Working on your Non-Stick Craft Sheet dry brush the pumpkin with 
Chicken Feed and Brown Sugar Jenni Bowlin Dabber Paint. 
This toned down the bright orange of the pumpkin. 

Die cut Tattered Leaves from Grunge Board.

Paint leaves with Rock Candy Crackle Paint. Let Dry.

Stain the Leaves with Rusty Hinge and Peeled Paint Distress Stain. 
Spray Leaves with Bronze Perfect Pearl Spray Mist.

Paint Grunge letters with Jenni Bowlin Fountain Pen Dabber paint. Let dry.

Distress the edges of the letters by Sanding them with Tim's Sanding Grip.
Ink letters with an Ink Blending tool and Foam using Brushed Corduroy Distress Ink.

Glue leaves and letters to pumpkin with Matte Medium.
Tie a bow with Jute twine and adhere to leaves.

Tammy Tutterow's reveals her pumpkin today to. 
Be sure to check it out... I hear it's fabulous. 

Don't forget to check out even more pumpkins on the Ranger Blog. 


Wednesday, October 12, 2011

"Sew Artsy" ATC

Check out this project on the Ranger Blog! 
Using the Tim Holtz Sewing Room Bigz Die and Inkssentials Surfaces Shrink Plastic 
you get this, super cute, tiny dress form. Great for ATC's. 
 Check out how to make this ATC here.

Tuesday, October 11, 2011

Spook-ology Class at Stampers Corner

Class at Stampers Corner Elk Grove, California was a scurry of creativity! 
Here are a few snapshots from class.


Finished projects from class. 


What a fun day!

Tuesday, September 20, 2011

Spook-ology Classes

Hi Bloggers!
I hope you've all had a chance to do some creating with the new Tim Holtz products for the holidays.
I have an upcoming classes you won't want to miss!
When Halloween meets Ideaology you get Spook-ology! Take a creative journey and make this amazing Type Tray. Learn techniques with Distress Stain, Alcohol Inks, Distress Crackle Paints and more. Everything for this project will be included and I mean everything, even halloween treats! 
Here is a few sneak peeks of the project.

Classes are being held 
October 6th at Stampers Corner in Elk Grove, California 
OR
October 15th at Scrapbook Territory in Berkeley, California. 
I hope to see you there!


Tuesday, September 13, 2011

Halloween ATC's

Hello blog friends! 
I've been so inspired by all the new Tim Holtz Halloween release I just had to make some more projects!

This ATC was made with grunge board die cuts using dies from the Alterations line (Mini Cat On the Fence). I started with a natural canvas ATC from Ranger's Inkssentials surfaces line, colored with Distress Stain then glued all the elements down. The fence was colored with Picket Fence Distress Stain and Distressed with an ink blending tool and Vintage Photo Ink.
 The cat has been flocked to make it look like fur. 
Aren't these little pods perfect for pumpkins in front of the fence. 
This spooky ATC starts with a black ATC and then stamped using Perfect Medium and powdered with Pewter Perfect Pearls. Happy Halloween, Calendar and Poison label are all stamped with pitch black Archival ink and then Distressed with Ink on your Ink Blending Tool. 
The mini skull die cut is a perfect size for cards, ATC, and the Configuration boxes. 
The Spider is from the Halloween Adornment set. 
 Stamp the Halloween background image using various colors of Distress Stain. I spritz the image with a little water before stamping it onto a Kraft ATC. Now stamp the spider and bats with Archival Ink. Emboss the stamped image with the matching embossing folder.
It's so amazing how it just lines right up. Ingenious! 
Pumpkin die cut has been painted with Rock Candy crackle and after it's dry color pumpkin with Rusty Hinge Distress Stain. The eye, nose and mouth where done the same way using Black Soot Stain. The BOO is a Salvage sticker from the Seasonal pack. Use a Charm Clip to attach this Muse Token.  

Happy Creating!