Friday, October 12, 2012

Halloween Door Hanger

BOO to YOU!
Are you ready for a challenge! Inspiration Emporium is challenging you to make a Spooktacular Halloween Decorations! Here is my version of the challenge.

 Stamp the large Circus Letter with Black Archival Ink onto manilla card stock or a tag. Let dry.

 Color the letters using Seedless Preserves Distress Ink on an Ink Blending Tool. Be generous.

 Spritz with water and then dry well with a Heat Tool.

 Cut the letters out with Stamp2cut or you can use scissors. 

 Cut a 2" strip of tissue wrap and run a gather stitch on the sewing machine down the center for gathering. Gather the tissue wrap then sew to a black satin ribbon. 

Also gather the black tulle down the center and then sew it to the center of the black ribbon as well. This will become the base for our project.

Using Stamp2cut and some bats out. No need to stamp just dial in the size you want the bats and cut them out. Easy!!!

Paint Glue N' Seal over the surface of the bats.

Add the new Stickles Dry Fine Glitter in Black Diamond. Shake off the excess. Do this to all the bats. Love the versatility of having loose glitter!

Using the Ribbon piece as your base hot glue the bird nest (I found these at the local craft store). As always be careful when using a glue gun. It's HOT!  Next glue the BOO and the bats.

Head over to Inspiration Emporiums Blog to see what the rest of the team has made. They are fabulous!! Join in by uploading your project and you could win Inspiration $$$$$.


Wednesday, October 10, 2012

Fun Halloween Decor!

Happy Wednesday bloggers! 

I'm sharing this fun decor project over on the Sizzix blog today! I love this new Sizzlit die from the Tim Holtz Alterations line "Halloween Shadows"!


Look at these cute little children! 
To see the step by step instructions head over to the Sizzix blog by clicking here!

Thanks for stopping in!
Richele

Friday, September 7, 2012

Stamp2cut Paris Notepad

Happy Friday bloggers! 

Thanks for stopping in, I hope you have some fun/creative time slated for the weekend. I'm back with more Stamp2Cut FUN! It's totally addicting! Once you get started you just don't want to stop. 

This is a note pad covered with Stamp2Cut goodness. The note pads are 4" x 6" available from the office supply store. I used Stamp2cut Cartridge #1 and the eClips.

Look at the dimension of the Eiffel Tower and it was so easy. Stamp the image, cut the image out with Stamp2cut and pop dot to your project. It doesn't just cut a rectangle around the stamped image. It will cut the Eiffel Tower and the post mark. Stamp2cut will cut a shadow that's a perfect fit. If you don't want to use a stamped image with it you can make it larger or smaller as well. Your imagination has no limits!

For the Note Pad here are the particulars. 
  • Stamp Pais stamp onto Manilla card stock twice with Jet Black Archival Ink.
  • Cut images out with Stamp2cut. One full frame and the second just the piece of the Eiffel Tower. 
  • Cut the “Carte Postale” out with Stamp2cut on the Black Kraft’Core. Sand edges with a sanding grip.
  • Ink the Paris piece with Distress Ink on an Ink Blending Tool.
  • Paint the Eiffel Tower with Distress Ink applied to the Craft Sheet and pick the ink up with a Detail Water Brush. I used two colors to create the look as if light is coming from one side.
  • Layer the Carte Postle piece over the card stock with pop dots. 
  • Line up the Eiffel Tower over itself with pop dots.
  • Fold the Kraft Resist piece over the top of the Note Pad. Tear the edge and ink the edges with an Ink Blending Tool. 
  • Adhere the Note Pad Cover that was created above to the Kraft’Core and then glue to the back of the Note Pad. 
  • Tie twine around the top tying a Philosophy Tag in the bow. 

Check out Inspiration Emporium for the supplies you need for this project.
Thanks for taking the time to see what's been happening in my studio!

Richele

Wednesday, September 5, 2012

Spooky Sizzix fun!

I'm so excited to show you my project today!
Stamp2cut meet Pop 'n Cuts. It's SPOOKY fun!

This is the outside of the card. I am still amazed by the detail that Stamp2cut can cut. AMAZING! That's all I can say. My dad was over today and I was showing him the detail from this card. He asked if I would cut that out by hand. I answered, I could but I wouldn't. Stamp2cut brings to the table an element of using cut images in a way you wouldn't normal because of how much time it would take. And to get a shadow perfectly cut to size. SPECTACULAR! 

And here's the inside. Look at those spiderwebs, cut using Stamp2cut, so much detail. WOW! The gothic BOO is on the Pop 'n Cuts portion of the card. Pop 'n Cuts is great for adding dimension to any card and Pop 'n Cuts makes it so easy. That Karen Burniston is  BRILLIANT! 

Head over to the Sizzix blog for the step by step instruction. There's a whopping 19 step photos for you to be inspired by. The most I've ever done for one post. Whew! 

Enjoy your day!
Richele


Tuesday, September 4, 2012

Ranger Projects!

I have a few projects over on the Ranger Ink web site for you to check out. 

First is this little "Notes" book made from a #10 Kraft Tag. I love the larger tags. You can make cards, journals, bigger tags...The tags also come in a #12 size, kraft, black and of corse manilla.  
Click here for the step by step instructions. 

Next up is my "Love" card featuring the new Stickles Dry Fine Glitter. Look at the shimmer. You can use the glitter with glue, wonder tape and even the new Sticky Embossing Powder.   So many colors to choose from.
Click here for the instructions. 

Check back tomorrow, I can't wait to show you my Sizzix project featuring Stamp2Cut and Pop 'n Cuts. It's spooky fun!!

Richele

Monday, August 27, 2012

Shrink Plastic Challenge!

Happy Monday! I hope you all had a fabulous weekend. 
Inspiration Emporium is at it again. Chelle and Joy challenged the team to create something using Shrink Plastic. So here you have it! 

It's a necklace, I can't wait to wear it and show it off. This Bird Branch die cut is one of my favorites and it's super cute all shrunk. 

Die cut the Bird Branch using Shrink Plastic, the die is from the Tim Holtz Alterations line from Sizzix. 

 Heat the Shrink Plastic with a Heat tool. As the plastic shrink it will curl up but not to worry keep heating and it will flatten back out. While it's still warm I also like to put an acrylic block on it to help flatten the image back out. 

 Look how cute it is now! The Ranger Shrink Plastic shrinks approximately 50%. 

 Color the backside of the Shrink Plastic with Copic markers. Work on a white surface to help see the color. 

After you are all done coloring add a layer of paint to the back.

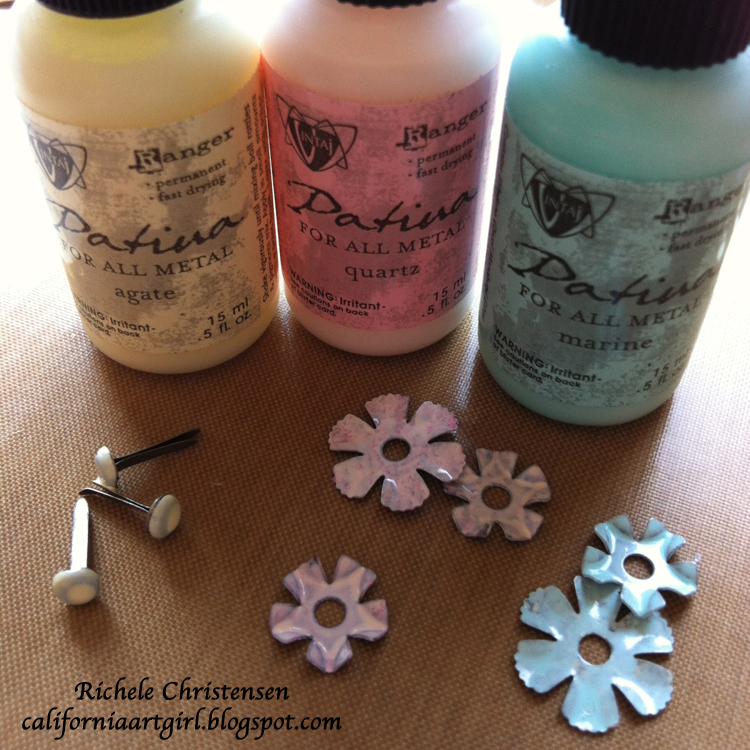
 Paint the Idea-ology foliage flowers with Ventaj Patina inks. I love how easy it is to paint metal with these inks and clean up is a breeze. Just wash your brushes out with water. 

Paint the oval Ornate Plate with the Patina Inks then sand with a Sanding block. 

Assemble your necklace by adding the Flowers with brads through the Ornate Plate. Cut an oval of music print card stock that has been mounted onto chip board to fit the Ornate Plate. Glue the oval into the Ornate Plate. This will be your background. Add the word "friends" from the ChitChat words. Pop dot and glue the Bird Branch to the Ornate Plate. Add a Bauble pearl to the bottom with a jump ring. Ball Chain make the perfect necklace, just attach with jump rings to the top of the Ornate Plate..  

Check out what the incredible Inspiration Team has created with Shrink Plastic. I guarantee you will be Inspired to join in and make your own. 

Thanks for stopping by!
I'd love to hear from you before you head over to the Inspiration Emporium blog to see more Inspiration using Shrink Plastic. 

Richele