I wanted to share this hot air ballon tag that was inspired by my demo at CHA. This stamp set seem to be a favorite from those who stopped by to see me demoing at the Stampers Anonymous booth.
What a great show!
This background technique is called wrinkle free distress.
Apply Faded Jeans, Broken China and Dusty Concord Distress Stains to the surface of your craft sheet.
Spritz stains with Biscotti Perfect Pearls Mists. This is one of my favorite Perfect Pearls Mist colors!
Swipe a #8 manilla tag through the stains.
Dry the tag with your Heat Tool.
The trick to this technique is to layer the inks on top of each other until you achieve the background your looking for. I usually take 2-3 passes through the ink. For the 2nd and 3rd pass you want to mono print the tag into the ink, which simple means set the tag into the ink and lift up.
See the spots all over the tag from mono printing.
Spritz water into your hand and flick the water onto the tag to create some light spots.
Dry the water spots with a Heat Tool. As you dry the water on the tag you will see the spots turn lighter. This is because Distress inks and Stains are reactive with water. So cool!
I wanted to create even more texture in the background by using this NEW mixed media set of Tim's. These will be well loved in my studio. They are great for creating texture as you will see.
Stamping the little dots with Broken China Distress Ink.
Stamp the larger dots in Dusty Concord Distress Ink.
You have now created a beautiful background on your tag.
Here is the set of stamps with the Hot Air Ballon.
Stamp the ballon with Jet Black Archival Ink. Dry ink with a Heat Tool. Archival Ink become waterproof after it dries. Perfect for water coloring.
Dab a little Dusty Concord Distress Stain onto the Craft Sheet.
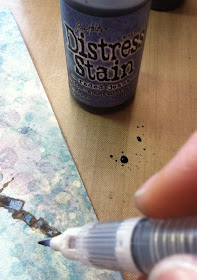
Pick the ink up with a water brush. Tim's new detail brush is amazing, it has a finer tip then most water brushes.
Paint the ballon with Dusty Concord.
Paint the basket with Vintage Photo Distress Stain.
Paint the flag with Faded Jeans Distress Stain.
The final stamp set I used is Attic Treasures. Loved all these images from before but now they are mini. Great to use on cards, smaller tags and ATC's.
Stamp Life is what happens... with Jet Black.
Ink the stamp by swiping the ink pad across the stamp. This will create a lighter stamping, kind of shadow stamping. Stamp the script only in the background, try not to stamp over the ballon and the words.
Color crinkle ribbon with Broken China and Dusty Concord Distress Stain.
Dry the ribbon with a Heat It Tool. Crinkle the ribbon as it dries. When dry attach to the top of the tag.
To a Philosophy Tag apply Snow Cap Dabber paint. be sure to get it in the letters.
Whip off excess paint.
Attach to the top of the tag with a Memo Pin and Jump Ring.
Darken the edge of the tag with a blending Tool and Foam using Chipped Sapphire Distress Ink.
Thanks so much for stopping by....
Richele


Thanks for sharing the technique, the result is amazing!
ReplyDeleteNICE....love those color combos too!
ReplyDeleteLaura
I love this technique... and you are so very talented!
ReplyDeleteYummy colors!
ReplyDeleteDeniseB
Oooo this is just a gorgeous tag richele....I so cannot wait to get some of those new Tim stamps.....beautiful work x
ReplyDeletekaz xox
Great tag! TFS
ReplyDeleteI am a background girl, and you so had me there at first glance! Major gorgeousness! Love your tutorial! I so need that brush!!! -----Baby Got Back!!!----LOL!!!
ReplyDeleteFabulous tag! Just moved those stamps to the top of my shopping list..
ReplyDeleteLove this tag, that background technique is awesome!!
ReplyDeleteLet's see ... balloon stamp, detail brush... my list keeps growing !!!
Love, love, love this tag! Gorgeous work!
ReplyDeleteLove this tag! Are those stamp sets new releases?
ReplyDeleteLove this!
ReplyDeleteThanks for sharing your techniques!
:-D
I need to start stamping again, this is great! Love the colors!
ReplyDeleteHi there! I just found U - and I'm so glad I did!
ReplyDeleteI was looking for some inspiration from the Sizzix pop 'n cut dies and found so much more.... U've made me in2 a happy subscriber :-).