Showing posts with label Halloween Cards. Show all posts

Monday, August 18, 2025

Halloween Coordinating Dies from Simon Says Stamp for Tim Holtz

Hello Friends! As you know Halloween is a favorite of mine. I absolutely LOVE creating for this fun holiday. My cards are made with the new Halloween Coordinating dies from Simon Says Stamp and they match several of Tim Holtz Stampers Anonymous Halloween Stamp Sets.  

Halloween Coordinating Die Inspiration

These pumpkins had too much Candy Corn. 

Pumpkinhead Coordinating Dies 309SSS
Pumpkinhead Stamps CMS309

Did you know Ghost LOVE Candy?

and just for fun he wobbles!

Halloween Doodles Coordinating Dies 437SSS
Halloween Doodles CMS437 

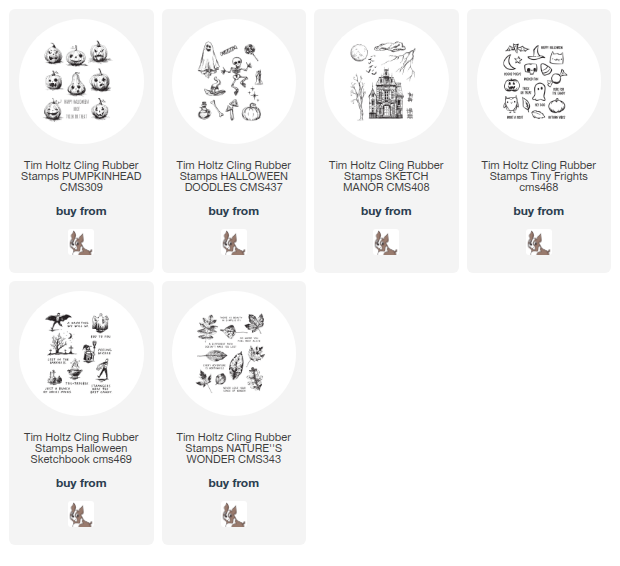
See all the fun Stamps sets below!

Tuesday, September 1, 2020

Wobbler Cat - Tim Holtz HaLLoWeeN Snarky Cat

Hello friends! Everyone loves a little Snarky Cat, right! The new Tim Holtz Snarky Cat Halloween set from Stampers Anonymous is perfect for those Halloween cards you need to make. And adding the Wobbler action on the cat makes him do a little shake shake, makes everyone smile. 

He looks like he just got in trouble for getting into the candy stash. Haha!

Stamp your favorite Snarky Cat, pumpkin and witches hat with Black Soot Archival Ink. 


Cut out all the stamp images and cut off the tail, don't worry we'll re-attach it later. 

Color the images with Distress ink and a waterbrush.  I think the new Crackling Campfire Distress Ink would be great for that pumpkin. when coloring it's so hard to keep the eyes clean so I stamped another set of eyes cut them out and adhered them after I was all done coloring. 

Position the new dot shifter stencil over an old book page and ink with Twisted Citron Distress Oxide Ink on an Ink Blending Tool.

Re position stencil lining up the dot to the engraved image on the stencil and Ink with Wilted Violet Distress Oxide Ink on an Ink Blending Tool. I like to use the Oxide Inks for this, they are a little opaque and I love that. 

Add a few stamped spider webs and of corse some spiders too. I used the Distress Oxide ink in Black Soot for the ink. 

Cut cardstock to mat your background. I used black Metallic Kraftcore and an orange card base. Do a little sanding on the cardstock then ink the edges with Black Soot Distress Oxide Ink.

Adhere the background and black piece together then add so random stitching around the edges leaving the loose ends of the thread. Use foam tape to adhere4 the pumpkin. 

Adhere the Witches Hat and the tail to the cat. Now add the cat with the wobbler.

Stamp the message with Wilted Violet and create a little flag and adhere with foam tape. 

Wow wouldn't love this cut cat and the wobbler make its even more fun. 

Thanks for stopping by!
Richele

Check your local scrapbook store or follow the links below and head over to Simon Says Stamp. 

Sunday, August 23, 2020

A Haunting We Will Go! Tim Holtz, Stampers Anonymous release!

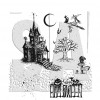
Hello friends! I'm back today with a card using Stampers Anonymous set CMS408 Sketch Manor from Tim Holtz. Love this set comes with all the components to create the perfect Haunted Manor! 

Distress Oxide Sprays and Inks are perfect to create this night sky and full moon glow. 

Lets start with the Haunted Manor. Cut a piece of Woodgrain Cardstock 5 1/2" x 8 1/2". Spray a piece of Woodgrain Cardstock with Distress Oxide Sprays (Antique Linen, Frayed Burlap and Iced Spruce) then spritz with water to blend out the colors. Dry with a heat tool. 

Add more Distress Oxide Sprays (Iced Spruce and Walnut Stain) and spritz with water again and dry with heat tool.  

As the color is dried you will get a totally different color then you think. After the piece is completely dry run the piece through the Vagabond or die cut machine a few time to flatten out the Woodgrain Cardstock a little. 

Using a Stamp Platform Stamp the Haunted House with Black Soot Archival Ink (must be a waterproof ink). You will need to stamp a few times to layer the ink. Just look at how cool the woodgrain shows through! 

Add color with regular Distress Ink (Black Soot, Fossilized Amber, Wilted Violet) this way the ink is translucent. Apply the ink to your craft sheet and pick top with a water brush and color the windows and doors. 

Create the background for a slim line card by cutting Distress Media Heavystock to 3 3/4" x 8". Spray card with Distress Oxide Inks (Black Soot, Blueprint Sketch, Mustard Seed, Spiced Marmalade, Wilted Violet). Be sure to add water to help blend the colors, dry with heat tool. Repeat as necessary drying between layers. Splater some Black Soot Oxide Ink over the background as desired, dry with heat tool. 

Adhere Halloween Label Tape to card where desired. Add black stitching around the card leaving the ends of the thread. I like to use a combo of straight stitching and zigzag stitching and I try to stitch crooked. 

Add a little BOO! at the top using the Label Tape. Ink the edges of the card with Black Soot Oxide Ink and then adherer to base card. Base card size is 4 1/4" x 8 1/2" so it fits in a #10 envelope.  

Adhere the Haunted House with foam tape.  Stamp Happy Halloween on a scrap of Woodgrain Cardstock with Archival Ink., ink the edges with Distress Oxide in Black Soot. Adhere to card with foam tape adding a little dyed Mummy Cloth (Halloween Trimmings) under the message. 

Add a Tiny Clip to hold the BOO! on the card. 

Adhere Hardware Heads to the ends of the Halloween Label Tape using a little Distress Collage Medium. 

Love the added texture of the stitching. 

You can see how the woodgrain shows through and give the house kind of an eerie feeling.  

Cut a piece of cardstock for the inside and ink the edges with Black Soot Distress Oxide Ink and then  stamp the flying bats and  a message. 

Thanks so much for stopping in!
Richele

Check your local store or click on the link below to go to Simon Says Stamp!
 

Thursday, July 27, 2017

Halloween releases from Tim Holtz

Hello friends! I want to thank everyone at Whim So Doodle for an incredible couple of days of classes and thanks to everyone who came out to classes too. The store is truly inspiring and they have everything you need for paper crafting, lettering, art supplies, gift items and even a quilting and sewing section. They also have Tim's Eclectic Elements fabric. 

Today I'd like to share a few samples I made for the Tim Holtz Halloween releases. The releases have been awesome. If you missed the Facebook live with Tim be sure to check his blog for all the details. I hope you love the new products as much as I do! 

SIZZIX ALTERATIONS
The new Sizzix Alterations release is full of classic, spooky and whimsical Halloween dies. 
You can make cards, Mixed Media projects, treat bags and so much more.  

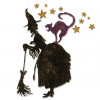
This card Bewitching Hour has to be my favorite card of the Sizzix release called Witchcraft. The die is a Thinlit Die and comes with the Witch holding her broom, the Cat and the Stars. 

Color the background on Mixed Media Heavyweight cardstock using Distress Oxide Inks (Seedless Preserves, Twisted Citron, and Black Soot) then die cut the Stars out of the background. The Witch and Cat are die cut from black cardstock and then I add Distress Oxide Ink with an Ink Blending Tool over the Cat using the new Black Soot.

For the word Halloween I inked the Rosettes Texture Fade with Black Soot Archival Ink and embossed it on to the Green cardstock which created this fun debossed paper. Die cut the word Halloween form the Thin Halloween Words Thinlits die.  The Thin Words die is perfect for cards! I also added one of the stars from the background for the center of the "O". I did some stitching around the card then assembled my card. 

Idea-ology
Idea-ology is always a favorite for me! Love all the little treasures that are perfect for this Vignette box.

Paint the Finials with Black Soot Distress Paint and set aside to dry. Add Halloween Design Tape around the front edge of the large Vignette Box and wrap around to both sides. Cut a piece of the Halloween Paper Stash to fit the back of the box. 

Choose a few pieces of Ephemera from the Halloween Pack and this will be the focal point of your piece . Elevate the Ephemera off the back of the box. I used a double stack of Game Pieces (about 1/2"thick). Tie Halloween Trimmings around the Finial at the top with a Halloween Shape Token. 

Cut pieces of Halloween Paper to fit behind the Halloween Transparent Tiles and adhere them about 1/4" off the back of the box. Add a thin layer of Glossy Accents to the Monocle. An Heirloom Rose is always a nice touch for the lapel. 

Add Apothecary Vials with labels and hand made tags to tie around the neck of the bottles.  Adhere the Mini Pumpkins and Skull with Collage Medium. You can also add a Halloween Word Band to the front of the box. Adhere Finials with Collage Medium and let dry. 

Stampers Anonymous
Stamps and Stencils are a staple for creating cards and great for Mixed Media projects as well. The new Halloween stamps and stencils are spooktacular I know you will LOVE them! 

Start with a Black Cabinet Card and sand it a little with a Sanding Grip to grunge it up. Add a little stenciling using the new Distress Oxide Inks on an Ink Blending Tool and the Crossed Layering Stencil for a magical effect. Because theses Oxide Inks are a Pigment/Dye fusion the inks have enough opacity to show up on black. The background of the house was also done with Distress Oxide inks. Stamp the Haunted House with Black Soot Archival Ink, then take the waterbrush and lift color where the windows of the house are, now you can add color back with a Fossilized Amber Distress marker. Add color to the sides and roof of the house too. 

For the base of the card I stamped the Skulls background over a Kraft card. Small Talk Occasions has several Halloween and fall sayings that work great! 

Alcohol Ink the Word Band, Numeral Token, and Roses. I also dyed some Linen Ribbon with Black Soot Distress Spray Stain. Adhere the layers and add the embellishments for this wicked haunted card. 

I hope you find these inspiring! 
Thanks for stopping by!
Richele

Check your local store or click the links below to head over to Simon Says Stamp.