Monday, January 30, 2017

Victorian Flip Frame

Hello friends! I have another project from Creativations from the Tim Holtz Idea-ology booth. My Victorian Flip Frame is a mix of new and vintage items. I think it's important to find different ways to use the same product. The Flip Frame can be used as a it's intended purpose hanging memories or the like with the rings that come with the frame. You can build a box to fit the back and create a shadow box, love this idea. And now I've created just a framed mixed media piece.  

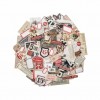
The Flip Frame was colored with Gold Metallic Mixative Alcohol Ink and Black Soot Distress Paint to create a dramatic vintage effect. Cut a piece of chipboard to fit the back of the Flip Frame then cover with Textile Surfaces for the background. Create a collage with the new Ephemera Snippets over the background. Some of the Ephemera has stitching added around the edges. I love the size of the mini Ephemera I can tell it's going to be a favorite! 
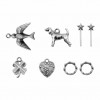
A vintage doily is layered over the Ephemera and then the lady with the beautiful hat was added after stitching around the edges. The lady with the beautiful hat is from the Found Relatives pack. Atop the photo are vintage flowers, Bouquet, Locket Key, Fanciful Adornments, even a little Vial Label with the word love has been added. The Quote Band was attached with a piece of Crinkle Ribbon that was dyed with Distress Ink. 

A large Adornment Arrow with the little Heart tied on with a piece of string covers the indentations of the frame. I used the Distress Splatter Brush to add a little Black Soot Distress Paint over the otter edges of the piece. 

Thank you so much for stopping by! 
What are some of your favorites from the new release?
Richele 

Thursday, January 26, 2017

Creativation - Sizzix - and My Fabric Planner

Hello friends! I'm back from Creativation and what a great show it was. Thank so much to everyone that came by the Sizzix booth and said hello! I loved meeting new friends and catching up with old friends. I'm just sorry it's only once a year. I have meet some of the most amazing people in this industry. 

The Sizzix booth was a show stopper with the new Tim Holtz release of Cityscapes, Wildflowers, Butterflies and so much more. I was so excited to work the both again this year.  I also had the pleasure of working with Aida Haron from Singapore so good to finally meet her in person. A special thank you to Tim Holtz, Jen Long and the Sizzix crew for welcoming  me back to the booth. 


Now to share one of my favorite projects that I created for the show. My Fabric Planner. I have combined all the things I love the most fabric, paper, stitching, inking and stamping. 
I will be adding this to my 2017 workshop list so watch my blog for more details! 

The new Cling Foam Stamps are so easy to use! And using them with the new Tonic Stamp Platform is a perfect match. 

Also the new Distress Oxide Inks are a must have! Just look at how magical these tab pages look. 

Thanks so much for stopping by!
Richele

A few of my favorite products from the show! 
Just click on the link to head over to Simon Says Stamp. 

Friday, December 9, 2016

Holiday Assemblage Clock - Ranger Ink Guest Designer

Hello friends!  I'm very excited to be a guest over on the Ranger blog today. 
I hope you will stop by and see all the details of my project. 


I love all the dimension that was created with the Woodland Trees, the stamped image of the cabin, the Decorative Deer in the foreground and decorating the outside of the Assemblage Clock was so easy using Metal Foil Tape. 
Click HERE to see how to make this wintery deco piece. 

Thank so much for stopping by! 
Richele 

Sunday, November 20, 2016

"Believe in the Magic of Christmas" kits for sale

Hello friends! I'm very excited to offer a kit for the Christmas season. "Believe in the Magic of Christmas" is created from some of my favorites from the Tim Holtz Holiday release. I hope you will enjoy making it as much as I did! 

Create a magical assemblage piece for the holidays filled with special treasures. The little deers watching Santa deliver presents to the little girl in her special holiday dress, beautiful glittered trees in the forest and even a beautiful tree with ornaments bring this piece to life. This winter assemblage piece is on a 7" x 9" oval wood base. A full tutorials including 50+ step photos makes it easy for you to create this project. 
Kit includes 7" x 9" wood base, House, all die cut pieces, Santa, Mini Lantern with batteries, Alpha Dice (full set), 6 Trees, 2 Deer, 2 Pinecones, Fractured Doll, 3 wood stepping stones, all papers cut to size, Cherry Accents, Distress Glitter (Vintage Platinum + Rock Candy), Mica flakes and complete tutorial with over 50+ photos. 
*Inks, paints and adhesive not included.

Kit - $75.00 plus $10.00 shipping  
Sorry US shipping only

If you're interested in a kit please email me at californiaartgirl@me.com 
Please include your PayPal address for invoicing. 
Thank you!


Your kit will come beautifully package so you feel like you're opening a present on Christmas morning!

Happy Holidays!
Richele

Thursday, November 17, 2016

Snowglobe Shaker Card - Tim Holtz Sizzix Alterations

Hello all! Do you remember being a kid and loving Snowglobes at Christmastime? I sure do, I still have some and look forward to displaying them during the holidays. Tim Holtz has a beautiful Thinlits die called Snowglobe and it takes me back to my childhood. 


Love the details of the houses, they even have doors and windows. No scene would be complete without a few trees and some snowcap mountains. And even little tiny stars to go with the trees or you can put them in the sky like I did. 

For our card position the Sizzix Alterations Snowglobe die over the cardstock and tape in position to die cut the shape. Love this years Paper Stash called Tidings the soft greens and reds give this paper line a vintage feel that perfect for Christmas.  

Apply Picket Fence Distress Crayon to the edge of the Snowglobe opening and smudge with you finger to blend out the edges. The Picket Fence edges will add a little glow around the Snowglobe. 

Cut a piece of acetate to cover the opening and adhere with Glossy Accents. Be sure to get the Glossy Accents close to the die cut edge. 

Add foam tape around the edge of the Snowglobe. Tip: if you remove the paper backer from the tape it's much easier to add the tape on the cured areas. Add a second layer of foam tape to create depth. Optional: Sew around the edge of the card. 

Apply Distress Crayon to the inside of the Snowglobe and smug with your finger, add a little water to you finger if needed to help the crayon spread out. Chipped Sapphire makes it look like a night sky. 

Die cut and assemble the houses, trees and the snowcap mountains. The die cuts all the pieces you need. The windows are a little rectangle that fits behind all the houses perfectly. The trees and mountains have a scoreline to add shape. Add Distress Ink with an Ink Blending Tool to the edges as desired. 

Die cut the Base of the Snowglobe from Woodgrain cardstock. Spray Antique Linen Distress Spray Stain over the base of the Snowglobe and let dry. Ink with Vintage Photo Distress Ink with an Ink Blending Tool. 

Add all the layers together. Leave a small opening at the top of the Snowglobe to add the Distress Glitter. I left a piece of the tape backing at the top so it wouldn't stick together. Add Rock Candy Distress Glitter inside the SnowGlobe. Once you have the right amount seal the card. 


Die cut the "Wish" from silver Deco Sheet that has been mounted to a piece of cardstock using the Vintage Tidings Thinlits die. Embellish the card with Metallic Trimmings and a Adornment Snowflake, Holiday Talk Metallic Stickers and a few Mini Fasteners. 


Who wouldn't love to receive a special card like this?

Thanks so much for stopping in! 
Richele

You can get all the goodies over at Simon Says Stamp. 

Thursday, November 10, 2016

Falling Leaf Card - Ranger Ink Featured Artist

Hello everyone! I'm so excited to have my project over on the Ranger Ink blog today. The card features Distress Collage Medium in Crazing over a stamped or die cut image and coloring with Distress Crayons. This is one of my favorite techniques to do with the Distress Crazing! I hope you will take a look at the full tutorial over on the Ranger Blog. 


Look at how the Crazing is brought to life when colored with the Distress Crayons. Check it out on the Ranger Ink blog. 

Thanks for stopping by! 
Richele