Wednesday, July 31, 2013

CHA the journey continues...

Happy Wednesday Bloggers!!

One of my favorite products were Tim's amazing stencils. I think stencils are great for adding another layer to your projects. Whether you are creating a mix media project, making a card or even a tag, stencils are a good way to add texture. Watch the video here, Tim is demoing for Paper Crafters Corner at the show.

Look at all the texture that was created with the stencil. Don't you want to reach out and touch it. The size of the stencils are perfect, so easy to use and storing them is a breeze with the hole at the top. Just add a ring to the top. Here are a few cards I made with my favorite stencils. 

This card was done with the Burlap Stencil.

Rays Stencil

Bubbles Stencil

Clockwork Stencil

Stars and Eye Chart Stencil

Measured Stencil

This card was one of my favorites the Splatter Stencil.

If you've never used stencil you should try them. It's so easy! 
Find these stencils and Tim's new products at Inspiration Emporium, they have it all coming soon!

Thanks for stopping by!
Richele

Monday, July 29, 2013

The CHA Journey!

Hi bloggers! Wow, it's been over a month since my last post. Sorry but I've been busy with CHA samples for Ranger and Tim Holtz. 

It all starts with an email. Are you available to make samples? YES, YES and YES! Next the packages start to arrive with new product! It's so exciting, but you can't share it with anyone because you are sworn to secrecy. So, you do a little happy dance to yourself and get to work. LOL 

One of the first packages were these beauties. If you liked Distress Markers before you will LOVE the new colors. So bright! So lovely! 

One night I just in front of the TV just coloring, I definitely wasn't watching any TV.  I was just coloring.

Tim's blueprint stamps from Stampers Anonymous are perfect for coloring! 

The next morning it was time to make some cards with the colored pieces. 

I had so much fun coloring.

Love this Stocking stamp. You could even add your name to the top of the stocking. 

For this sample I colored the stamp with the Distress Markers. The new colors are so beautiful don't you think?

 This was the scene of my work area for the past couple months. I don't know what it is, but I never have any space to work and I don't think a bigger work area is the answer. I think it's just me. 

Soon after the product arrives I had a stack of samples to send off for inspiration to others. I look forward to making samples every year. 

The samples make it to CHA and end up on this table for sorting. Tim and Paula decide which booth they will be displayed in. 

 Then the samples are put onto display boards before the show opens. I'm always amazed how things come together in such a short amount of time. 

 The show opens! Here is Tim showing off the NEW Distress Glitter! 

Look at the crowd! Everyone is so excited! 

Thank you Tim, Paula and Ranger for letting me be part of the journey! 
I loved being a part of it!
Richele

Thursday, July 4, 2013

Happy 4th of July!

Happy 4th of July bloggers! 
Have a great one and enjoy the freedom we all have because of the brave men and women. Thank you! 

Thursday, June 27, 2013

Freedom Card

Hi bloggers! Hope you're all doing well! 

 With the 4th of July right around the corner seems appropriate to share a card to gear up for the holiday. Do you have plans for a big celebration, maybe a BBQ or possibly some fire works? 

 Stamp the image onto a piece of watercolor paper with jet black Archival ink. I like using water color paper when coloring with Distress Markers. The inks react so beautifully. You can color directly on the paper and once you add water with the water brush you don't see any lines from coloring. Makes you look like a pro water color artist! 

 Color the flag and background with Distress Markers and a detail water brush. I made the outer part of the strips darker as well as the center. 

 Adding silver Stickles to the stars adds a little sparkle. 

 I masked off my flag and added some background stamping using Pumice Stone Distress ink. I love what it adds to the background. 

Stamp the word "freedom" onto a tag label with jet black Archival ink. Add to the tag! These little tags even have a clear bubble that goes on top. 

Cut your blue base card from Kraft'core, score and fold in half. Sand and ink the edges. Do the same for the red matte. 

 Tie red striped paper string with a bow and don't forget to add the freedom tag label. 

 Stamp the border with Vermilion Archival ink on manilla card stock. Ink the happy only from the happy birthday stamp with cobalt Archival ink from Tim's Simple Sayings Collection stamps and stamp within the border to the left side. Trim the strip as shown. Rub black soot Distress paint on the mini numeral "4", buff off excess and adhere to card. Also add a "th" for the 4th with a black pen.

For more inspiration, Paula Cheney has an amazing card using the same set. 
Also see Tim Holtz has been posting fun projects all week! 

Hope you all have a wonderful 4th of July.....

Thanks for stopping by!
Richele

If you need some crafting supplies, Inspiration Emporium has it all!

Monday, June 10, 2013

Journey Pop 'n Cuts Card

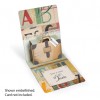
Hi bloggers! You are going to LOVE this card. I'm using the NEW Pop 'n Cuts Suit Case Insert with the base die from Karen Burniston's Journey collection. I think this is her BEST release yet. Thanks Karen! Don't forget to check out Karen's blog for tons of inspiration! 

I started thinking that a suit case usually involves a journey, so I thought the message "Enjoy the Journey" was a perfect match.

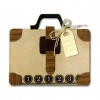
Here's a peek at the inside, I love the little Suit Case! It looks just like a vintage leather bag. 

 I learned this faux leather technique when I went to Ranger U so many years ago. It's so easy to transform your paper to look like leather. First generously spray the back side of the Kraft'Core paper with Inkssentials Ink Refresher. I chose a rust color that looks like leather. 

 Massage the Ink Refresher into the paper. As it works into the grain of the paper, the paper will become softer and you will be able to crumple it up. 

 Flatten out the paper and dry with a Heat Tool. 

 Because I want my Suit Case to be more sturdy I glued a kraft tag to the back side of my leathered paper with a Collage Glue Stick. 

 Die cut the Suit Case using the from the reinforced leather paper. Ink with Vintage Photo Distress Ink on an Ink Blending Tool.

 I also die cut all the little pieces from Grunge Board. I love all the little details that come on Karen's die. Paint the pieces with Brushed Pewter and Black Soot Distress Paint. After the paint is dry sand and ink with Vintage Photo.

I did a little stitching on my sewing machine to add a band down the center of the Suit Case and add detail to the strap. Sand and ink these pieces too. 

 To attach the details to the Suit Case I added Mini Fasteners. 

 Die cut the inside and the outside of the card using Karen Burniston's Base die and the new Suit Case insert from the Journey collection. 

Die cut the phase "enjoy the journey"from black Kraft'Core. Before you punch it out, it's best to sand at this time, this will help the letters not to tear. Ink with Vintage Photo Distress Ink.

 Add a strip of the leathered paper to the front of the card, don't forget the mini fasteners in the corners. Adhere your message. Now it's time to adhere the inside and the outside together.

Add vintage travel photos and a few tickets to the front of your card. Tie the wander tag around the top of the card with paper twine. 

 Adhere the Suit Case to the inside of the card. The message was added to the little tag with Remnant Rubs. Tie the tag to the handle with a bow using one ply of the paper twine. 

Just look at this little Suit Case. SUPER CUTE don't you think! 

Thanks for stopping in!!
Richele

Inspiration Emporium is a FUN place to shop!!