Hi friends! Did you hear?
All the Mini Distress Inks have been released from Ranger!
Happy dance!
My Mini Distress Ink collection is complete!!
My Distress Mini Tins are full!
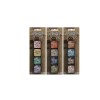
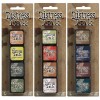
Here are the new sets!
Set #10
Tattered Rose, Squeezed Lemonade, Iced Spruce, Bundled Sage
Set # 11
Shabby Shutters, Festive Berries, Tea Dye, Milled Lavender
Set # 12
Brushed Corduroy, Chipped Saphire, Aged Mahogany, Pine Needles
Don't forget to check out Tim's blog for an awesome video, a giveaway and some links to more amazing projects!
My project today features the very first set of Tim's cling mount set, Nature's Moments by Stampers Anonymous CMS001.
I love these flowers. I have used this set over and over again.
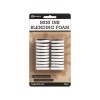
To start our project we are going to work backwards. Visualize the colors and placement of the flowers and color the Watercolor Cardstock with Distress Ink on an Ink Blending Tool.
Dry ink with a heat tool. It's important to dry the ink so the Embossing Powder doesn't stick to this ink.
Stamp the flowers with Distress Embossing Ink positioning it over the colored areas.
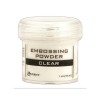
Apply Clear Embossing Powder over the stamped flowers and shake off excess.
Heat the Embossing Powder with a heat tool.
Apply dark Distress Ink like Chipped Sapphire over the card. The embossed areas will act like a resist.
I also added some Pine Needle Distress Ink at the bottom. Continue to layer the ink until you get good coverage.
Postion the Dot Fade stencil and spritz with water, blot off excess water, lift stencil carefully and blot again with a towel.
Love how the ink lightened to create the texture in the background. Ahh…the magic of Distress!
Potion the Latticework stencil, spritz with water, blot off excess water, remove stencil and blot off excess water.
Look at all the lovely layers!
Lay a piece of copier paper over the embossed images. Iron with a hot iron to lift the embossing off the flowers. Repeat using a new piece of copier paper each time until the embossing over the flowers is lifted.
See how the embossing is lifted off onto the copier paper.
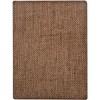
Tear the all the edges to fit the Burlap Panel.
Distress the edges with a Paper Distresser and add Brushed Corduroy Distress Ink with an Ink Blending tool.
Cut a piece of brown Kraft'Core to 5 1/2" x 7 1/2", sand the cardstock with a sanding grip, distress the edges with a Paper Distresser and ink with Brushed Corduroy Distress Ink on an Ink Blending Tool.
Ink the edges of the Burlap Panel with Brushed Corduroy Distress Ink on an Ink Blending Tool.
Apply a generous amount of Multi Medium to the back of the Corners and place on opposing corners.
Use rubber bands to hold the Corners on while the Multi Medium dries.
Sew around the edge a few times if desired.
Choose some ChitChat words, ink the edges with Distress Ink on an Ink Blending Tool and add to the background.
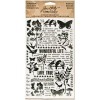
Add Remnant Rubs
Color Crinkle Ribbon with Distress Ink and wrap around your hand three times.
Tie ribbon with another piece of Crinkle Ribbon around Burlap Panel.
Don't forget to use a square knot.
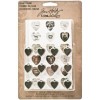
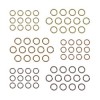
Attach a Heart Charm with a Jump Ring to a Wire Pin then pin to the bow. Can't wait to hang it on the wall!
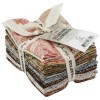
This could be YOUR lucky day to win one of these prizes! That means 4 chances to win and it could be you, I'll keep my fingers crossed. Leave me a comment by midnight on Sunday, August 17th and this just might be your lucky day!
Thanks for stopping in!
Richele
Here's the products I used, just click on the links below and it will take you over to the Simon Says Store!


