Hello friends! Our project features some of the new holiday dies and Framelits from the Tim Holtz Alterations collections. I also want to share a few tips on die cutting and some storage solutions I've learned along the way.
Die cutting intricate dies can sometimes be a challenge and this project is full of them.
Place the dies face up on the magnetic platform, this gives you more cutting power. Position a layer of wax paper in-between the Thinlits die and the paper. The wax paper helps the die to release from the Thinlits die and in many cases you don't even need to push it out of the die, it simple falls out. On these snowflakes they still needed a little push in the center. Another tip is to run the die through the machine a few times and this usually does the trick. Using these few tips will help make your project go smoothly.
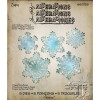
Die cut several white snowflakes using the Paper Snowflakes Thinlits set. I love this set it comes with 5 dies all different sizes and shapes.
It's important to clean out the die after each use. I use the Alterations Die Pick to aid in pushing out the bits that are left behind. This tool is also great for picking pieces out of steel rule dies the tip is made from steel and is strong enough that it doesn't bend.
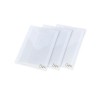
As for storage these Alterations Storage Envelopes are perfect to keep Framelits, Texture Fades and Thinlits in. They are made of a sturdy plastic and load from the top so you don't loose anything out of them.
The packaging that comes with your dies fits right in the envelope to keep it labeled for you.
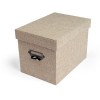
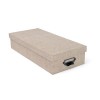
Now that the dies are in their Storage Envelopes they fit perfectly in these beautiful Tim Holtz Die Storage Boxes.
The boxes are a fabric covered wood box. They will look great in your studio and keep your dies very organized. You can add them to your wish list for Christmas!
Cut a large piece of watercolor paper to fit inside a frame. Carefully layout the snowflakes on to the background. Cover your work area to protect the surface from overspray.
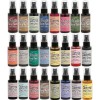
Spray Distress Spray Stain in Tumbled Glass and Brushed Pewter over the background. Work from about 2 feet up and spray one color at a time. Let the stain fall on to the watercolor paper to create droplets. Let the stain dry before adding the next layer.
Once the stain is dry remove the snowflakes.
Even the snowflakes are pretty with the stain on them. Set them aside for now we will be using them later.
For our tree take a piece of 12" x 12" red Kraft-core cardstock and mark the center. To create our tree cut from the center mark to the corner. This will give you a triangle.
The base of the tree is 2 1/2" x 3" cut from the scrap of the tree.
Tape the tree and the base together on the back side.
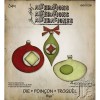
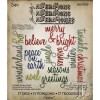
Die cut Holiday Words Script Thinlits, Paper Snowflakes Thinlits, Stacked Stars Bigz die and Retro Ornaments Bigz die using white cardstock.
Position elements on the tree and adhere pieces with Glossy Accents.
Here's an overview of the tree but I think the packages need a little jazzing up.
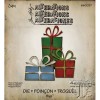
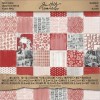
The Merriment Paper Stash would be perfect for the presents. Die cut the presents using the Retro Packages Bigz die.
Use foam tape to adhere all the elements to the background.
I added a little snowbank at the bottom for the tree and packages to sit on.
I love how dies are so versatile to use on all kinds of projects. From cards to decor pieces dies are a great way to create projects!
Have a great week!
Richele
Find all the goodies at Simon Says Stamp!


