Thursday, October 30, 2014

Eclectic Elements - Giveaway!!

Hello everyone! Now that I've unpack from my trip to Quilt Market I found some goodies in my suitcase that need a new home! 
Yippee prizes are always good and I have three of them.  

The giveaway is all about the faux Cathedral Window technique using the Tim Holtz Courtyard Frameworks die. You will love this technique.
 If you missed my post earlier this year you can find it here

Leave a comment by October 31st at midnight PST and I will pick three lucky winners! 
Tim and Paula are also doing a giveaway on their blogs! 
Good luck!

Have a great day!
Richele

Wednesday, October 29, 2014

International Quilt Market 2014 - Houston

Hello...I'm just back from Quilt Market in Houston Texas. 
I have wanted to go to Quilt Market in Houston ever since I started quilting over 30 years ago. All the new fabric releases, new machines, new products and then there was the amazing quilts. So much inspiration! I had such a great time working in the booth, meeting new friends, being inspired by all the quilts and hanging out with my dear friends Tim, Mario and Paula. 
and
 So excited...my project made the front cover of International Quilt Festival Magazine. Yippee!! It's the Floral Hexagon Tote.

 The Tim Holtz Honeycomb Frameworks die was the inspiration to create the front of the tote. So don't think your paper crafting tools are just for paper, many of them will work on fabric projects as well. All the details on how to make the beautiful tote are in the magazine! To order the magazine click here

Once we arrived it was time to get things set up and un-pack the crates. Here are Tim and Paula getting ready to hang the beautiful quilt.

Off to Schoolhouse for Tim's presentation on the Eclectic Elements Fabric line.

Here's Tim adding a few finishing touches to the booth. 

The Hash Browns for Breakfast quilt hanging at the back of the booth was so popular there is now a pattern. Click here for the free pattern on the Coats website. 
You can also see more projects here

The booth was beautiful with the signature Tim Holtz vintage feel. 

The new catalogues with lots of inspirational projects. 

The bolts of Eclectic Elements fabric. A girl can never have too much fabric! 


Here are a few projects that I made with the new fabrics. Ruffle floral pillow, star pillows and a small sewing wallet. I can't wait to make a one for myself. 

On the last day we were able to take a peek at all the beautiful quilts on display.

 But this display of the Ruby Jubilee was the most breathtaking display I have ever seen. 
Simply amazing!! 

Check out Tim and Paula's blog for their recap of the show.

Thanks for stopping by!
Richele

Tuesday, October 21, 2014

Trick or Treat Bags for Halloween!

Hello friends! Our project today is all about quick! If you're like me you're always looking for simple projects at the last minute. I think these would be fantastic for your child's class or for a halloween party favor. 

The dies we are using today are Movers and Shapers Dies. Movers and Shapers dies gives you the versatility to move the dies on the magnetic platform to create a shaped window where you would like it.

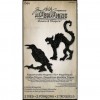
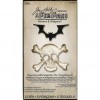
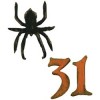
I set up the In the Bag Bigz die with several of the Halloween Mini icons. Some of my favorites for this project are the Mini Spider and 31, Mini Cat and Raven and the Mini Skull and Bat

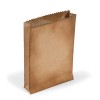
Die cut the In the Bag Bigz die using Kraft'core cardstock and don't forget to position the Mini Halloween Spider, Bat, Cat….they will die cut at the same time! How easy is that?

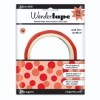
Use a strong adhesive like Rangers Wonder Tape to adhere the flap of the bag. Glossy Accents is also a great adhesive for our project. 

Fold on all the score lines and adhere the flap to the bag. Assemble the bag by folding the little ends in on the sides, then fold in the other large flaps. 

Push in the tab in  to create the box bottom. 

Ink the edges with Vintage Photo Distress Ink on an Ink Blending Tool. Adhere a 2 3/4" x 3" piece of Kraft'Core cardstock inside the bag over the Halloween icon. 

After the bags were all together I decided to stamp a message at the bottom. Flatten the bag out then stamp with Jet Black Archival Ink using the Simple Sayings set. 

This set is great for all occasions, it even comes with a little border. 

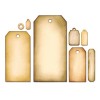
Die cut some little tags from Kraft'core cardstock using the Tag Collection Framelits set. Love this set! So many different shapes and sizes of tags. 

To stamp a little something on our tag I used these innovative stamps. They're Mason Row Pegz Stamps available through Stampers Anonymous. Just click them together kind of like Legos to create your words.

Create a few little words like boo or eek! 

Stamp with Jet Black Archival Ink on to the tiny tag. 

Punch a small hole at the top of the bag, tie Striped Paper Sting with a bow and don't forget to include the cute little tag. 


Movers and Shapers dies are a great way to create custom projects! 
Happy Halloween! 

Thanks for stopping in!
Richele

Here's all the goodies I used! 

Monday, October 13, 2014

Halloween Treat Boxes for Simon Says Stamps

Hi friends! I'm very excited to be over in the Simon Says Stamp Blog today sharing how to transform the Laboratorie Paper Stash into some cute Treat Boxes for someone special. 

Check out the full tutorial here.

Hope you all had a great weekend. We had a very busy weekend around here...getting ready for upcoming classes, hanging out with my daughter who is due to have a baby girl in about a month and going to apple hill with the grandkids today!
 It actually felt like fall here today! 

I hope you all have a great week!
Thanks for stopping in.
Richele

Friday, October 3, 2014

Scary Pumpkin Configurations


Hello and happy friday! I'm so excited to be over on the Tim Holtz blog today with a spooky project for Halloween. The project features the new Distress Spray Stains and I have to say they are to die for. 

Check out the full tutorial here
Have a creative day!
Richele