Friday, December 9, 2016

Holiday Assemblage Clock - Ranger Ink Guest Designer

Hello friends!  I'm very excited to be a guest over on the Ranger blog today. 
I hope you will stop by and see all the details of my project. 


I love all the dimension that was created with the Woodland Trees, the stamped image of the cabin, the Decorative Deer in the foreground and decorating the outside of the Assemblage Clock was so easy using Metal Foil Tape. 
Click HERE to see how to make this wintery deco piece. 

Thank so much for stopping by! 
Richele 

Sunday, November 20, 2016

"Believe in the Magic of Christmas" kits for sale

Hello friends! I'm very excited to offer a kit for the Christmas season. "Believe in the Magic of Christmas" is created from some of my favorites from the Tim Holtz Holiday release. I hope you will enjoy making it as much as I did! 

Create a magical assemblage piece for the holidays filled with special treasures. The little deers watching Santa deliver presents to the little girl in her special holiday dress, beautiful glittered trees in the forest and even a beautiful tree with ornaments bring this piece to life. This winter assemblage piece is on a 7" x 9" oval wood base. A full tutorials including 50+ step photos makes it easy for you to create this project. 
Kit includes 7" x 9" wood base, House, all die cut pieces, Santa, Mini Lantern with batteries, Alpha Dice (full set), 6 Trees, 2 Deer, 2 Pinecones, Fractured Doll, 3 wood stepping stones, all papers cut to size, Cherry Accents, Distress Glitter (Vintage Platinum + Rock Candy), Mica flakes and complete tutorial with over 50+ photos. 
*Inks, paints and adhesive not included.

Kit - $75.00 plus $10.00 shipping  
Sorry US shipping only

If you're interested in a kit please email me at californiaartgirl@me.com 
Please include your PayPal address for invoicing. 
Thank you!


Your kit will come beautifully package so you feel like you're opening a present on Christmas morning!

Happy Holidays!
Richele

Thursday, November 17, 2016

Snowglobe Shaker Card - Tim Holtz Sizzix Alterations

Hello all! Do you remember being a kid and loving Snowglobes at Christmastime? I sure do, I still have some and look forward to displaying them during the holidays. Tim Holtz has a beautiful Thinlits die called Snowglobe and it takes me back to my childhood. 


Love the details of the houses, they even have doors and windows. No scene would be complete without a few trees and some snowcap mountains. And even little tiny stars to go with the trees or you can put them in the sky like I did. 

For our card position the Sizzix Alterations Snowglobe die over the cardstock and tape in position to die cut the shape. Love this years Paper Stash called Tidings the soft greens and reds give this paper line a vintage feel that perfect for Christmas.  

Apply Picket Fence Distress Crayon to the edge of the Snowglobe opening and smudge with you finger to blend out the edges. The Picket Fence edges will add a little glow around the Snowglobe. 

Cut a piece of acetate to cover the opening and adhere with Glossy Accents. Be sure to get the Glossy Accents close to the die cut edge. 

Add foam tape around the edge of the Snowglobe. Tip: if you remove the paper backer from the tape it's much easier to add the tape on the cured areas. Add a second layer of foam tape to create depth. Optional: Sew around the edge of the card. 

Apply Distress Crayon to the inside of the Snowglobe and smug with your finger, add a little water to you finger if needed to help the crayon spread out. Chipped Sapphire makes it look like a night sky. 

Die cut and assemble the houses, trees and the snowcap mountains. The die cuts all the pieces you need. The windows are a little rectangle that fits behind all the houses perfectly. The trees and mountains have a scoreline to add shape. Add Distress Ink with an Ink Blending Tool to the edges as desired. 

Die cut the Base of the Snowglobe from Woodgrain cardstock. Spray Antique Linen Distress Spray Stain over the base of the Snowglobe and let dry. Ink with Vintage Photo Distress Ink with an Ink Blending Tool. 

Add all the layers together. Leave a small opening at the top of the Snowglobe to add the Distress Glitter. I left a piece of the tape backing at the top so it wouldn't stick together. Add Rock Candy Distress Glitter inside the SnowGlobe. Once you have the right amount seal the card. 


Die cut the "Wish" from silver Deco Sheet that has been mounted to a piece of cardstock using the Vintage Tidings Thinlits die. Embellish the card with Metallic Trimmings and a Adornment Snowflake, Holiday Talk Metallic Stickers and a few Mini Fasteners. 


Who wouldn't love to receive a special card like this?

Thanks so much for stopping in! 
Richele

You can get all the goodies over at Simon Says Stamp. 

Thursday, November 10, 2016

Falling Leaf Card - Ranger Ink Featured Artist

Hello everyone! I'm so excited to have my project over on the Ranger Ink blog today. The card features Distress Collage Medium in Crazing over a stamped or die cut image and coloring with Distress Crayons. This is one of my favorite techniques to do with the Distress Crazing! I hope you will take a look at the full tutorial over on the Ranger Blog. 


Look at how the Crazing is brought to life when colored with the Distress Crayons. Check it out on the Ranger Ink blog. 

Thanks for stopping by! 
Richele

Sunday, October 30, 2016

12 Tags 2016 Technique Remix - Frankie

Hi friends! I'm so excited I had a chance to do the October tag this weekend and the bonus is I did it with 2 of my grandchildren. We had so much fun! Kayla and Ty each picked which one they wanted to make! Kayla picked the Vampire, Ty chose the Zombie so that left the Monster for me. 

This is my finished tag. 


I love this guy! 

Here is Tim's tag! so cool! All the instructions for the tag are on the Tim Holtz blog

This is Ty and Kyla hard at work! 


Here are all of our projects. 
Kayla and Ty did such a great job and I had so much fun with them! 

Thanks for stopping in! 
Happy Halloween! 
Richele

Friday, October 28, 2016

Pretty Stitched Purse - Craft Thread

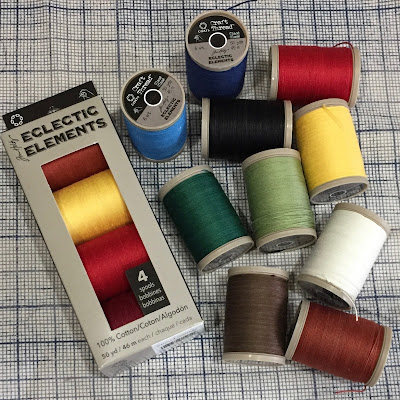
Hello Friends! Quilt Market is fast approaching this weekend in Houston, Texas so I wanted to share this fun sewing project using the new Tim Holtz Eclectic Elements Thread. 

I'm a Big fan of the new Craft Thread. The thread is thick for hand stitching, it has a dull finish, sews beautifully without tangling and comes in 3 color palettes warm colors, cool colors and neutrals. I love that it's on a spool so there's no tangling and you don't have to separate it. If you want to learn more about the thread head over to Paula Cheney's blog.

I created this fun purse with patchwork and little stitched flowers.

Mother of pearl buttons and vintage lace makes the perfect addition. 

Look how the French Knots make cute flowers over the stitched band. 


Even the Hearts are hand stitched with the Eclectic Elements Craft Thread. 

If your interested in the full pattern for this project it's featured in the Simply Vintage Magazine, Autumn 2016, No. 20. 


Thanks for dropping by!
Richele


Find the new Craft Thread at Simon Says Stamps, you're going to love it! 

Friday, October 21, 2016

Easy DIY Pumpkins - Idea-ology style!

Hello friends! I love decorating for Halloween, you know how I love Halloween! 
Here are a few ideas for decorating pumpkins that are fast, simple and fun, even the kids would have fun making them! 
If your looking for more inspiration don't forget to check out Tim's recap of the Halloween Inspiration Series. They are to die for!  

From just adhering Jute String, coving a pumpkin with Design Tape or just as simple as adding a few embellishments to the top.

Gather a few supplies... Halloween Jute String, Materialized Design Tape, Sizzix Alteration Punches, Crayons, Type Tokens, Wicked Adornment Spiders, Crypt Cameos, Cardstock and of corse some pumpkins to decorate. 

Using Design Tape to cover the entire pumpkin. I worked from top to bottom and around, as you work make sure you burnish the tape as you go. Some wrinkles will occur but not to worry I think it adds a little character. When I was working I overlapped each previous strip and kept working until the entire pumpkin was covered. 

Add shading with Distress Crayons. I added Rusty Hinge and Vintage Photo to darken the top and bottom. Scribble the Crayon on in small areas and blend out by rubbing with your finger. 

I also darkened the indentations to enhance the shape of the pumpkin.  Draw the Distress Crayon on the pumpkin and smooth out by rubbing with your finger. 

Add reindeer moss using a hot glue gun to adhere to the top around the stem. 

Sand the cardstock, punch leaves and branches using the Sizzix Alterations punches by Tim Holtz. 

Ink the leaves with Distress Ink on an Ink Blending Tool. Add them to the top with a glue gun. 

Color the Typed Token words with Distress Crayons then rub off the excess with a dry towel. 

Add Wicked Adornment spiders and Crypt Cameos with Jump Rings to the Swivel Clasp then adhere to the top of the pumpkin. 


Can't wait for Halloween I love to see all the little children come to my door in their costume. and the candy is pretty good too!

Thanks for stopping by! 
Richele

Looking for all the goodies to make this project by just clicking on the links bellow!