


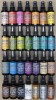
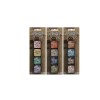
I really love the way the Tim Holtz Distress Spray Stains dance on the surface of the paper, they are highly pigmented so you get vivid colors and the sprays have the same properties as Distress Ink which means they are reactive with water. The new Distress Spray Stains work with Layering Stencils, direct to paper, in conjunction with Texture Paste, you can make a smooth background or a dotted background, color ribbon….doesn't get much better that that!

Sit back relax and enjoy the fall project!


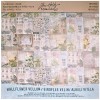
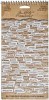
Rub on a few Remnant Rubs in various places on the Manila Cardstock. Spray the Distress Spray Stains directly on to cardstock, dry with a heat tool. Pick up extra ink from craft sheet, dry again with heat tool. Repeat as desired.

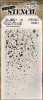
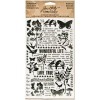
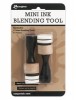
Position Layering Stencils and ink with Gathered Twigs Distress ink on an Ink Blending Tool.

Continue adding layers.


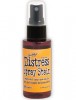
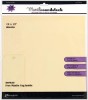
Die cut pieces using the Pumpkin Parts Bigz die from Distress Watercolor Cardstock. Spray the main pumpkin with Spiced Marmalade.


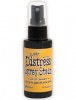
Color the segment pieces with Wild Honey and the stem with Vintage Photo.

Ink the edges with Gathered Twigs Distress Ink on an Ink Blending Tool.

Build your pumpkin adhering the layers with Multi Medium and let dry.

Apply a generous layer of Clear Rock Candy Distress Crackle Paint and set aside to dry. Once the Crackle Paint is dry ink the cracks with Gathered Twigs Distress Ink on an Ink Blending Tool.

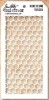
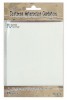
Die cut two branches from Wallflower Vellum using the Spring Greenery Decorative Strip.

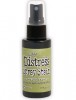
Color the branches with Crushed Olive, Spiced Marmalade and Peeled Paint Spray Stains, let dry.

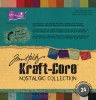
Cut a base card and mat from Kraft'core Cardstock. Sand the edges with a Sanding Grip. Distress the edges with a Paper Distresser and then ink with Gathered Twigs Distress Ink on an Ink Blending Tool.

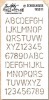
Here is another new favorite…the new Alphanumeric Thinlits…oh my! These are going to be soo fun! I chose the word "FALL", positioned it, held them in place with a piece of Tissue Tape and ran it through my Vagabond to die cut the letters. Oh the possibilities are endless! The Alphanumeric comes with 125 thinlits for around $20.00…now that's a bargain!

After I die cut the word "FALL" I did a little stitching with black thread on my sewing machine. Stitch under the word a few times and around the card.
Adhere all the layers together. Use foam tape to adhere the pumpkin. Adhere the little branch with Multi Medium. Add a few Chitchat words from the seasonal pack and don't forget to ink the edges.

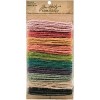
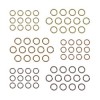
Tie a bow at the top of the card with Jute String, attach a Countdown Coin with a Trinket Pin and a Jump Ring.

So much to love…Distress Spray Stains, Layering Stencils, Crackle Paint, Alphanumeric and…what will be your next favorite??
Thanks for coming by, I'm so thankful you did!
Richele
If you're looking for the goodies I used…. Visit Simin Says Stamp!
 |  |  |  |  |
 |  |  |  |  |
 |  |  |  |  |
 |  |  |  |  |
 |  |  |  |  |
27 comments:
Wow, what fabulous colours Richelle. So very stunning. Hugs from Scotland. Rita xxxx
ooo all that inkyness makes me giddy!! TFS Rachele....it looks totally YUMMY!
Great fall card Richele! I can't wait to get my hands on Tim's new stuff!
Scrumptious fall card! I love those new Alphanumeric dies, too! Don't have any stains...yet...but if it's distress it's gotta be great!
Wonderful faul card. Thanks for showing how you made this beautiful card Anneke. www.annekescardart.blogspot.com
I enjoy your creations, especially Fall themed. Mixing TH, Sizzix and Ranger you can't go wrong.
Looking at your teaching schedule, I see you are going to be in Topsfield, MA in December. I am hoping I can be there. Living in Central VT, travelling can be a bit tenuous at that time of year.
Love this wonderful card!
Greetings Linda
Lovely! I love all the different techniques you used. My package with a few colors should be arriving today. I was eyeballing the whole set, but my wallet yelled at me and reminded me the electric bill was due :)
Jess
Love this card :)
Fredrikke
Beautiful Card! The pumpkin has such a gorgeous effect. love it!
Great background Richele and that pumpkin is fabulous!
You've been having fun. These look marv!
The layers on the pumpkin are my favorite part of this creation! Love the. Colors on it!
LOve this card! Pumpkin is stunning and the background fabuolous! thanks for sharing your step by step! BArbarayaya
Brilliant project, stunning work with those new sprays and I just love the way that pumpkin turned out!!!
Love the rich Fall colors. Your pumpkin is gorgeous and the background is too. This would make a lovely wall hanging or canvas, as well. Thanks for sharing your many beautiful ideas!
Oh, yes there is so much to love, Richele!! This is a Gorgeous card! I love everything--the colors, that new pumpkin bigz die, oh and since you mentioned the value of the alphanumeric thinlits--Oh, that's going on the wish list for sure :) Fabulous step-x-step, Richele! Happy Friday!! XOXO-Shari T.
I agree with Shari ... so much to love!! I adore the layered pumpkin. Now on my "gotta have" list :) And those letters ... that is one amazing set of thinlits. I can hear my bank account groaning already!
Thanks so much for the lovely tag you made for the mini distress ink tin give away. I just got it this week. I've been out of town for a few weeks. You made me feel so special because you took the time to gift wrap it and make a tag. You are an amazing person. Thanks again. -- Mary Elizabeth
I love these! I'm kind of annoyed that Simon Says doesn't offer a discount if you buy the whole set, though.
Love that layered pumpkin. One of my favorites!
Beautiful colours and layers!
love the card! very inspiring! I will have to try it !
This is brilliant the crackle on the pumpkin is fab. I have those stains on my ever lengthening wish list x
WOW!!! The colors just POP! Love it!!! I want to make one this!
Wow. Hopped over from Tim's blog. Great card.
I love this card!!! I will be adding those thinlits to my stash. Thanks for all you do Teach!!
Beautiful card... I didn't realize the greenery strip had fall leaves like that I was looking for some and I HAVE that strip Duh !! ... I NEED that pumpkin LOL !!
Post a Comment