
Hello everyone! A few days ago Paula and I decided to play with the new Tim Holtz Distress Crayons. So fun just seeing what the Crayons will do. We tested the Crayons with the new Distress Collage Mediums, the use of texture paste, using a waterbrush or smudging with your finger, stencils, and more!
First up is my piece from the Ranger Designer Challenge.

The challenge was all about the Distress Crayons. Each person was given one of the NEW Distress Crayon sets, one of the new Dina Wakley Media Boards (love them) and a few odds and ends.

First I added some dictionary print to the outside of the board using Multi Medium. Die cut pieces were also added using the new Tim Holtz Mixed Media #2 die. Next a thin coat of White Gesso to tone down the print a little.

Now to add some color with the Distress Crayons. (a little scary) I drew the Crayons on my Craft Sheet, added a little water and painted it on my board. I loved how the crayons stayed translucent and how the colors blended together.

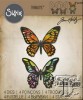
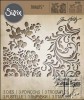
The Butterflies are die cut with the new Detailed Butterflies Thinlits from Watercolor Cardstock and Metallic Kraft-core..

For the finishing touches I added some stencil work with Distress Paint, the frame is from the new Framed Panel also painted with Distress Paint, a little white spatter and a hint of Foil Sheet applied with glue stick here and there.
Now for the fun….

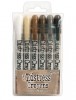
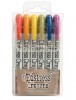
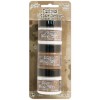
The Distress Crayons are sold in sets of 6 and there is 3 color palettes to choose from.
(and yes you need all of them)
They have the consistency of lipstick.
They're water reactive.
You can color with them, smudge them with your finger or use a brush with water.

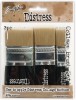
First Paula and I added Texture Paste in regular, Translucent Gloss and Translucent Matte using a stencil. We also added some of the new Collage Mediums and ephemera.

Regular texture paste takes the crayons very well.

Translucent Gloss Texture Paste - the Crayons were wiped off with a wet cloth before the crayons dried. Love how the texture of the canvas shows in the paste. I guess the paste settles into the canvas as it dries. (Happy accident)

The Photo Booth photo has Collage medium over it and a little Crazing medium as well. Crayons were added directly to the surface then smudged with my finger. The edges were darken with the black soot Crayon then smudged and blended out.

Coloring was done with the direct coloring technique and smudged with the finger. Colors used - Rusty Hinge, Peeled Paint, Vintage Photo, Black Soot. Love that the brush strokes show. When I started the canvas it was blue and purple, I wiped it off with a baby wipe and started adding the browns and black.

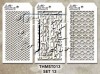
The finishing touch was the stencil work. Laying the stencil in a few areas and lifting off the color with a wet cloth. Did I mention Tim has MINI Stencils? The scale is smaller then the original stencils and they come in a set of 3 with 19 sets to choose from. Perfect for card making or mixed media projects. They're going to be a favorite!

It's crazy how many ways you can use the new Distress Crayons.
The reactiveness of the Crayons make them very fun to use.
The possibilities are endless and I can't wait to play more!!
Thanks for stopping by!
Richele
 |  |  |  |
 |  |  |  |
17 comments:
I can't wait to get these crayons!
Both pieces are amazing! Can't wait to get my hands on this new stuff. TFS Richele!
very nice Richele. I am going to pre order some!!!
Love the vintage look and feel.
Ohhhh love all the different techniques that you are showcasing! The distress crayons are my #1 I have to have from Ranger - and yes, I agree I NEED them all!
Love this post!!!!! You are a wonderful teacher! I placed a pre-order with all new stuff! I can't wait to use them! I would like them now !!! BArbarayaya
Great post. Beautiful colors and designs.
absolutely stunning creations............definitely need those crayons xx
TFS
Annie
Love the grungy photo creation. Gotta get the dark crayon set!
LOVE the Crayons, and LOVE your pieces using them! Your Designer's piece was GORGEOUS...love the soft tones!!! Great to see you too.
Love your designer piece, the colors are stunning! These crayons look amazing. I can't wait to get mine.
Wonderful designs Richele and fabulous results with the Distress crayons. I have mine on order (got all the colours :O) and can't wait to start playing! Thanks for the inspiration! Deb xo
These both look amazing and really showcase the new products. Lovely!!!
What a great project - thanks for explaining all the steps! My distress crayons are on order and I can't wait 'till they come!!! :-)
Both are lovely. I was afraid of the bright colors--not my thing. But what you did with them are lovely. Of course the earth tones are fantastic.
Would have loved to see how you did the techniques (via video). I'm afraid I didn't understand how you did some of the steps. But your projects look lovely and really show the qualities of the crayons. :)
Your creations are beautiful! Love both, but the butterflies are very stunning.
Post a Comment