Hello…with Thanksgiving fast approaching I thought it would be fun to create a few towels for this festive season. I've used a steel rule die and these dies aren't just for paper. These dies can be used to cut a multitude of surfaces like fabric, felt, paper, chip board, tissue paper, acrylic, even an aluminum can and more.
Just think of all the possibilities.
Just think of all the possibilities.
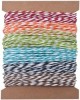
Supplies needed: small towels, felted wool or felt, thread, sewing machine, jute string
Optional: batting

I purchased a few little towels from the grocery store for our project.

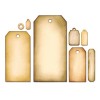
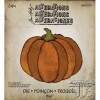
Die cut the felted wool with the Pumpkin Parts Bigz Die. You could also use regular felt for the die cut pieces.

Here's a look at the die cut pumpkin parts you'll need.

Layer all the pieces together.

Position the layered pieces on the towel and pin in place.

Using a zigzag stitch, stich around all the edges.

Add a little bow of Jute String to the top of the pumpkin next to the stem.

After I worked on the first pumpkin I wondered what I could do to make the process a little easier. I decided to add the pumpkin in layers this time. Stitch the base of the pumpkin down and then the stem.

Continue stitching the pumpkin segments over the base pumpkin. Add a little bow of Jute String next to the stem of the pumpkin. Another change I made to the second towel is that I didn't use any batting. It was easier to sew but I also liked the first pumpkin because it was a little puffier. You could also hand stitch the pumpkin with a blanket stitch.
I think it just comes down to personal preference. I think napkins would be very festive too!

Can't wait to display my towels at Thanksgiving! What are your plans for the holidays? We have a big crowd coming, I think it will be a table for 20…I can't wait to see everyone!
I also have some exciting news! My daughter Ashley and her husband Kirk just had their first baby this past week! And here she is…

Clara Ann
7 lb. 1 oz.
19 1/2" long
She is the sweetest baby ever!
Have a great day!
Richele
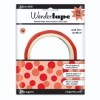
Products I used…
 |  |