
Hi friends…I'm sure you've heard about the new MINIS!! Right!
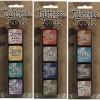
There is now 12 more to LOVE!! I know what you're saying. I already have the bigger ink pads. Well I'm here to tell you that there are many things that are great about these little gems. They're great for carrying to a crop or to a friends house for play time. So compact! Easy to handle for inking your favorite project. The Minis are the perfect fit with the Mini Ink Blending Tool. They are great for the technique I'm going to show you… and they're also awesome to GIVEAWAY!!! So don't forget to leave a comment at the end of the post for a chance to win your very own set..

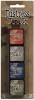
Here are all the available colors. Which is your favorite?
It was so hard for me to choose so I got them ALL.

Our project for today features mono printing with a Layering Stencil using the Mini Distress Inks.
This technique is in Tim's "A Compendium of Curiosities" Volume III. The book is filled with tons of techniques and inspiration!!
This technique is in Tim's "A Compendium of Curiosities" Volume III. The book is filled with tons of techniques and inspiration!!

Choose your colors of Distress Minis and Layering Stencil.

Apply ink directly to the BACK of the Schoolhouse Layering Stencil. Start with the lightest color so not to contaminate your ink pads. These Mini Distress Inks are perfect for this technique.

Generously mist the ink with water.

Gentle press the stencil onto a piece of watercolor cardstock or Manilla works great too. With the stencil still in place blot off the excess ink with a paper towel.

Slowly remove stencil, blot with towel if necessary and let dry.

Here are a couple background combinations.

Sand and ink the edges with a Gathered Twigs Distress Ink on a Mini Ink Blending tool.

Cut a small oval to fit the Industrious frame. Stamp a little background text with Scattered Straw Distress Ink.

Add a few Botanical Remnant Rubs to the oval. It's easiest to cut the Rubs out, position them and then rub them into place.

Wrap the Jute Twine around, tie with a bow, add the flowers and layer it all together

I love this background to showcase my little birds.

With the softer background I made an Easter Card. All the steps are the same, just add the bunny after you apply the Distress Glitter.

Use chipboard to die cut the Mini Bunny and Bow from the Movers & Shapers Magnetic die set. Apply Glossy to the Bunny and Bow, poor Distress Glitter over them, shake off the excess and let dry.

Isn't this the cutest bunny every!

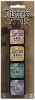
Here are the Mini Distress Inks!
You know you want them so leave a comment by April 17th at midnight PST and I will announce the lucky winner Friday morning for these little gems!
Thanks for stopping in!
Richele
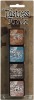
Here are all the color sets.
 |  |  |  |
 |  |  |  |
131 comments:
I get so excited when I think of all the room I'll save! Most of my other inks are cubes or dew drops, and these will fit right in!
So beautiful Richele!!! TFS girl! :D
Love your projects Richele. They are both wonderful. Thanks for a shot to win those bundles of ink joy.
Those mini distress inks are too cool for words. I love them because they are so portable. Your cards are great, thanks for the instructions!!!!
Thanks for a chance to win the minis, So fun!
Oh my gosh, I love the cards. Thanks for showing us the background technique. I so want the new minis colors! Thanks for the chance to win some. Yay Distress!
Your cards are absolutely fabulous!! I love the designs and techniques you used!! The new minis are so awesome!! Perfect for summer RV trips :)
Love those mini"s and what a great technique for quick backgrounds!
OMG this is gorgeous.. Thaks for a chance and winning the minis..
Love those new ink pads and the Easter cards!! :)
Oooh your cards are fabulous! Thanks for having such a great giveaway. I would so love to find them in my Easter Basket!
Perfect size tontake with you on the go! Brilliant idea $
Wow! Have not seen these yet so I sure wouldn't mind having them to play with!
Gorgeous delicate backgrounds! Love Distress inks, and these minis are So cute and convenient!
Beautiful card -- and fun technique to ink the back of the stencil! Love all your little details. :)
That stencil technique is AWESOME! I love the birds too! Happy Easter!
Sweet cards! I especially like your little bunny. Thanks much for the how-to info and also the chance to win the fun inkpads!
Love that bunny card with the fun tinsel twine!
Vintage photo is my favorite. Now I can keep them all the colors on my desk
Vintage photo is my favorite. Now I can keep them all the colors on my desk
Beautifully original elements on these Easter cards! So much fun to see how you use these techniques and minis in such creative ways! TFS!
Linda (:
Love your Easter cards. Love the new minis. I have one pack so far. Thanks for the technique. It's great having ideas what to use these wee ink for.
Love this! Happy easter!
Thanks for win the bundles of ink.
Beautiful card- I love seeing how the minis are even more perfect for techniques like this! Sure would love to win some :)
Thanks for the step by step instructions with pictures for the stencil technique. I think I just might get it right this time, lol. Love those minis!
Awesome technique with the stencil! I love the colors you used on the Easter card, so I'll choose that set as my favorite, #4! I love the idea of these mini ink pads to pack up and take to a crafty get-together!
what fun! I love distress inks.
Thanks for sharing these fun techniques!
Sandra ltb
Your canvas and card are adorable! I'd love to win some of these mini inks. cricutrookie@AOL.com
Love the idea of inking up a stencil like this! Who wouldn't love to win a set of the distress minis? I know I am anxious to own them all. Thank you for the opportunity to win a set!
I love bunny card, it is so cute. The light background looks great. I would love to win these and try them out.
Love how you reversed the stencil and the glitter on the bunny and bow. Thanks.
Richele your project are both wonderful, as always! Thanks for the chance to win these little lovely inks!!!!! BARbarayaya
Spun Sugar is a must for soft backgrounds! Can't wait to own the newest colors! Love your cards!
That bunny is fantastic with the brown glitter! I can't wait to try these minis. :)
Jess
What gorgeous backgrounds, I see why the mini ink pads are so good for this! Let me get my hands on some of there & NOBODY GETS HURT!
Sally
Love the colors especially set #4 Great for Easter.....your techniques and ideas stencils and background s WOW can't wait to play
Your cards are sooo cute and the mini distress pads make it so easy to get color just where you want it!
Your cards are gorgeous Richele! Thanks for the chance to win :-)
Love all the new colors. They are handy and convient for taking with you on the go...
My favourites are the blues, nice to see the colours mixed up so that I need to buy them all to get all the blues! Your cards are beautiful, I love the tip about using watercolour paper, it gives such a delicate looking background. Thanks so much for the chance to win! Anne xx
Beautiful cards! I just love these minis!
Thanks for sharing the technique with the stencil, can't wait to try it! I'd love to win some of the new mini's :) Thanks so much for a chance to win!!
Never thought to ink the stencil like that! Great idea....LOVE your cards, too....especially the EASTER BUNNY!!!!
Great technique! Thank you for sharing. Love the minis, it will make traveling with them easier.
What an ingenious way to get more versatility from your stencil. I love how this technique turned out on these cards, I will have to try it. Thanks for the chance, I love these minis, just haven't got any yet.
love these cards! Especially love the reverse stencil technique. I need some of these minis!
Love the cards!!!!
Those little minis are so cool. I love how you used them. I would love to try your technique.
Love your technique! Your cards are beautiful! I have to get the mini ink pads if for no other reason but to do your technique! Thanks for sharing
Love the stencil technique and your fabulous use of the industrious frames!!! Thanks for the giveaway would love to add this second release of minis to my collection :)
Minis!!! awesome must have for on the go crafting.. thank you for the chance to win! great use on stencil technique can't wait to play with them!!
I love the background of both cards .. such a cool technique. Thanks for a chance to win :) Have a great day !
Great projects. And YAY! 12 more colors! Thank you!
The new minis are great, so compact for traveling! I can't wait to get some.
I love your stencil technique on the cards you made! Thanks for the inspiration and the chance to win!
How cute these are!!! And your tutorial is wonderful. Thanks for the chance to win!
I could actually have all the minis on my work desk & still have to to create. Who could ask for anything more?
I am very impressed by your detailed information and instructions, beautiful cards! Thanks so much for the chance to win, I'd love to have them all ..... LOL
Majo
Thanks for the inspiring cards. Would love to win the inks and get started making magic!-Karen Seidlitz
These look like so much fun to play with! Do need! Fingers crossed.
Peggy
Your cards look great (and fun to make). I just got the mini ink blender and can't wait to get these mini ink pads. Thanks for the chance.
What lovely cards - and that bunny IS adorable! Thanks for the chance to win the ink pads :)
LOVE!!!! The colors are amazing and what a great idea for a background!! I would love to win any of these combos are great!!
The frames make those cards look really special. Would love to win some inks!
thanks
~Kate~
I'm always so impressed with your work! Awesome cards Richele, Thanks for sharing and the chance to win:):)
Thanks for the amazing backgrounds, Richele! Great idea. I'm already making a list of ways I want to use the mini's, as I love doing small-format work!
Cute little devils with a big impact! Love your cards!
Such lovely cards. I just love the mini's, so much easier to store and carry. Loved your technique for applying ink to the back of the stencil, such a great background. Thanks for the chance to win.
i would love a set of these great ink pads, cant wait to try them out.
Thanks so much for sharing your great cards and how to make the background! Love that bunny!!!!!
Oh these are so fun... gonna try this ( oh no I only have set #3) guess I'll be shopping for more very soon. I love the combination of colors ... got my storage case all picked out!!! They are just such a cool size ... now I can carry more colors with me without feeling like I'm taking the "house" ... LOL !! Light bulb moment... I'm gonna go make that card ... I've got those colors in large pad with little blending tools :) !!!
I did two bunnys w/ vintage photo ink and vintage photo glitter and they came out perfect.... fun.... thanks.
I love the cards that you made here, thank you so much for the chance to win these adorable little mini distress inks
That is the cutest bunny ever!!! Loved the background stamp behind him too and of course the frame. Did not think I would use the letter stencil but now it is on my wish list. Thank you for the inspiration.
the bunner card is so adorable and the birdie card so beautiful! TFS and for a chance to win! kmassman gmail
I really like the way the backgrounds turned out! Both are pretty!
Great things come in 'little packages'. How does one choose?????
Thanks for the mono technique showing us how versatile these great new minis are!!
Stencils are my new favorite "tool"! and these minis are the perfect compliment to them!! I love your cards - thanks for the tutorial!
I've never used Distress Glitter, but I'm now interested in it after seeing the chunkiness of it on your bunny!
I'm not sure which one I prefer! The way you did your technique used different colors to make one beautiful project. I usually choose colors in nature and those for 'masculine' cards. I didn't even know about Distress Glitter which looked great by the way. I agree with Lynda I would like to see how that type works after seeing your project too. If I picked a color I think I would go bold for my taste and say 'yellow' as a color to choose;) <3 the products by Tim Holtz! Thanks for sharing and now I will be sharing your blog on FB, Pinterest and If I can figure it out I will 'tweet' it;) -con
Thanks for a great giveaway!
Love these! :)
Zoe
zoe.may1@yahoo.co.uk
Got a set at a scrapbook retreat and used them all weekend wht a fabulous idea! Wouk love to have them ALL!! Heehee thanks for the opportunity! Tami Jackson
tamimjackson@gmail.com
Oh your bunny looks good enough to eat! I'm already a fan of the big distress inks, and would love to have a set of the minis - thanks!
Wow...what an inspiration! Can't wait to try that clever stencil technique. The ink colors that you chose are really beautiful. Would LOVE to have a chance at winning some mini's - don't have any of those yet, just some of the regular one's, which I use on almost every project I do. Thanks for the chance.
Love that soft background you made through that stencil! I would love to do that too with those darling baby inks.
Thanks for the opportunity to maybe win these little beauties, I love the technique used to create your backgrounds, I am definitely going to give it a go. Your cards finished are beautiful, thanks for sharing ideas with us.
I would love to try these lil Mini cuties! And that Chocolate Bunny looks good enough to eat! Nom nom nom
These are great cards and I can't wait to try this technique. I love all of Tim Holtz products and have all the distress inks. I can see that the minis would be great to take to my card groups instead of the bigger ones. I have several of the new stencils that I will use to do this. I would love to win the minis. Thanks for the offering to win.
Love your cards. Will definitely try out the technique.
Love the bunny! I am surely going to have to have all of the colors of the minis!
What sweetness you have created with these cards! These minis look to be so handy. How fun to have you, Richele, share your background technique ~ THANK YOU! Tim Holtz/Ranger just keep amazing me with all their new ideas, techniques and products! SO FUN!!!
Springtime greetings.........~Sandie
Wow! I love both of these! So pretty and great backgrounds as well!
Love your projects! And love the minis! Thanks for the chance to win!
Love both of your projects. The bunny is just too cute!! Beautiful backgrounds.
Oh, Richele, these are darling and the backgrounds you created look so fun! I'm definitely going to try this. I actually have all the goodies too, except for the Mini Distress Inks, of course. But they are on top of my list!! Maybe I will win some to start my collection. Thanks so much for the giveaway!!
Love the technique you used on the background for your projects. Another use for all of my stencils. Also love how each set of mini's compliment each other so well.
I must admit I did think, "I already have the big ones!" but these look pretty handy! ;-)
They are so cute! And I love what you've done with them - thanks!
They say great things come in small packages!!! I'll say! Love these minis!
I love this background technique! Can't wait to try it. I'm going to have to get kit #6 first with broken china...one of my faves!
Working with distress inks is my favorite thing to do ...absolutely love the stencil/spray technique!! Beautiful Easter Cards !!! To pick a favorite mini kit? #1..#3 and #5....are on my shopping list!
I LOVE both of these cards! That close up shot of the Bunny--AWESOME! I could eat that bunny!! Just Gorgeous!
Thanks for giving us a chance to win the newest mini's! They are cute -- but not as cute as that distress glitter bunny! XOXO-Shari
LOVE to have these new bitsy babies! Your project are both awesome -- TFS!
I LOVE your glittered bunny card! The TH minis are definitely on my wish list!
j adore la carte avec le petit lapin!
So adorable! I love the soft look of the inks through the stencil. and i think I seriously need that bunny!
Wow, I love what you did with the stencil. Those mini distress inks are soooo cool. I think the way they stack will be so handy for travel.
Your cards are completely gorgeous. I love that little bunny, but I think the cards with the birds just might be my favourite of the two.
Love your cards, love the minis!!!!!!!!!!!!!
Great cards. I have the bunny die so I can't wait to try this one. The minis are sooooo cute. Would love to win them!
Wow! Love the cards! So Vintage chic! Oh how I would love to win just 1 of these great lil sets! Perfect for travel so you can still create wherever you go!
Thanks for the chance and sharing these beautiful cards!
I love ALL the colors! I need them all so that I can bring them with me to crops :)
FabUlous backgrounds! Very cute bunny too. I tend to go for the blues and greens, but lets be realistic. You know I want them all. ;)
Love love love the new minis. Have to have them all.
Love the new minis - cute, collectable, ... great colours ...
Wow, I do want them! Great cards, love the backgrounds!
Wow, wow, wow, love your cards! All the different backgrounds look so gorgeous and I adore the way you have finished them!! Great way to use those mini pads!!
Hi Richele,
I love what you've done here for Easter.
Now send me those Minis.
Lois
Gorgeous gorgeous cards! I love the stenciled numbers on the backgrounds! Happy Easter to you!
These are gorgeous cards! Thanks for the tutorial. I am going to pin it!
Great tutorial...thanks for the chance to win!
Awesome cards, love the bunny. I'd love a chance to win the mini distress inks, thanks for the chance.
Gorgeous cards Richele, sheer delight for the eyes and thanks for the chance of this awesome giveaway. xx
Very nice Cards:-) I am looking foreward to the new color comming to Denmark.
Love the cards what a fun and easy was to use the distressed inks and stencils! I will try this soon. Thanks for a chance to win! I love your beach cards today too at Simon says!
Wonderful cards and thanks for the tutorial - it looks like so much fun!
I am loving these new minis.
Now my pockets are empty and ready for the Minis!
Great tutorial thanks! Kit 1 has pretty summer colors!
love the technique with the stencil! thanks for a chance to win all these minis.
This is a fabulous technique! Thank you for sharing it. I would have never thought of inking the whole stencil and flipping it over :) LOVE IT. That bunny looks good enough to eat....seriously! Thank you for the inspiration this morning.
Awww I'm too late - but what a beautiful springtime technique! Thanks :) (PS came from Tammy Tutterow's site)
Post a Comment