
Hi friends…..today I want to share the coloring technique I've been using on my Bird Crazy projects. I have totally fallen in love with these guys and before my last post I hadn't colored any Bird Crazies, not even one.

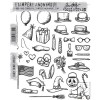
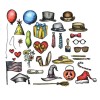
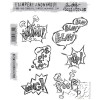
Now I'm Crazy about them and the accessories make it even better!

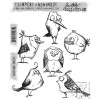
First lets talk about paper. It's very important to use a good quality Watercolor Cardstock. I use the Ranger Watercolor Cardstock. I love the it allows you to blend the colors so beautifully. Stamp the Bird Crazy of your choice onto the Watercolor Cardstock with Jet Black ArchivalInk and let dry.

 Now cut the bird out. Don't forget no fussy cutting required because there's this AMAZING Thinlits set that cuts out the birds for you. It's soo detailed! Coming soon will be the Thinlits set for the accessories. That will make it so easy!


I like to die cut my birds before I color them just incase I don't get the die lined up or it slips. Here's my sandwich…use the Magnetic Platform on the bottom, next the Precision Base Plate with the metal side up (perfect for this detail cutting), lay the stamped piece face up, line up the Thinlits dies and then one cutting pad on top. Send it through your Vagabond or the Big Shot.


I like to die cut my birds before I color them just incase I don't get the die lined up or it slips. Here's my sandwich…use the Magnetic Platform on the bottom, next the Precision Base Plate with the metal side up (perfect for this detail cutting), lay the stamped piece face up, line up the Thinlits dies and then one cutting pad on top. Send it through your Vagabond or the Big Shot.


Now for the coloring….you have 2 choices
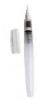
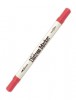
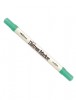
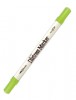
1. You can color directly on to the bird with the marker and blend it out with the Detail Waterbrush. OR….


2. Scribble the marker on to your craft sheet, pick the color up with the Detail Waterbrush and color. I find this works the easiest if you're working with a dark color or you are wanting a light area like the breast of the bird. One things for sure there's lots of different ways to color! Use what works best for you and have fun.

It's very important to dry the color as you work because you don't want to overwork the cardstock when it's wet. Over working the cardstock will cause it to pill up.
I also find to avoid streaking that I wet the entire area each time I add color. especially to the light areas. Now that I have the entire bird colored as desired I wanted to add a little something to the image.

I fell in love with the Distress Spritzer the first time I used it. It just adds a little texture and I like that. I also think that the Distress Spritzer hides imperfections that might have come up when you were coloring your image. Load the marker into the Distress Spritzer so the tip goes over the spritzer nozzle.


The trick here is to not show a hard line…I still want the belly of the bird to be light. Masking will create hard lines so I use my finger. If you hold your hand above the surface a little it will bleed under unlike a mask. If you don't want to get inky you can always wear a glove. It really does wash out pretty easy, just use a craft scrubby!


Here are a few finished cards!

Once all the coloring is done Ink the edges with Distress Ink on an Ink Blending Tool.

Add the wings and eyes to your "Bird Crazy" girl or boy with foam tape. Adds such great dimension!
Here are a few finished cards!

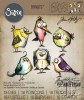
I like these Bird Crazy stamps so much that I've started to give the birds names.
Harriet is on the left she is a little shy just like me!
She likes to hang out with her friend Ethel.

And this is Max!
Max loves Harriet and has decided on Valentines day he's going to proclaim his love for the first time to her.
#maxandharrietforever

Sam likes to fly the red, white and blue!
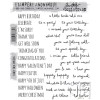
I love this background stamp don't you?

Maxine is ready to go trick or treating.

Ethel was a little cold so she put her hat on.

Graduation day for ______!
I need help naming this one, please leave me a comment with your suggestion.
I'll be back soon with more of these cute Bird Crazy cards.
Thanks for stopping in.
Richele
Get your Bird Crazy supplies from Simon Says Stamp!
 |  |  |  |
 |  |  |  |
 |  |  |  |
 |  |  |  |
 |  |  |  |
 |  |  |  |
 |
83 comments:
The little Grad dude looks like a Franklin to me...
Your cards are marvelous!
I'd name him Mortimer.
Awesome card ideas! LOVE the Christmas one!
Brilliant cards , love the colouring and the add on elements. Tracy x
That is a great tip about cutting first, very sound advice! I love that you call my favourites Sam and Ethel, they really suit the names. I love all of your cards, your colouring is wonderful! I think Bertie would be my choice for the last bird's name. Anne xx
How about Albert? (As in Einstein) Richele, thank you so much for the tutorial. I've been studying your coloring in your recent posts, wondering how you achieved that speckle texture. Great tip to use the spritzer and your finger to mask off the area softly! I love when I learn something new! Thank you!!
Fabulous. .these birds are such fun. I would call him Arthur x
Love all of your cards Richele! TFS your technique. How about Charlie? That name would work for boys and girls.
Love your coloring! Great idea with the spritzer - will have to try that!! Thanks for sharing. I think he looks like a Bentley...
Love your cards! I think he looks like a George :) Thanks for the great coloring tutorial.
Oh so fun! Great tips on coloring our feathered friends. So looking forward to getting my wings on those dies. I think our graduate looks like Leonardo (as in Da Vinci). Thanks for sharing.
I absolutely adore your cards Richele! Masking with your finger is great tip, I will definitely try that out. I also love all the backgrounds, I've ordered ALL the stamps! #enabler #crazyaboutyourcrazybirds ... (Edward)
Richele how about Bug Eye Purple Pete! Love what you did here. Thank you for the tutorial. Your birds are great...
Einfach fantastisch.
Die Vögel wurden alle super in Szene gesetzt.
Großes Kino... :-)
Herzlichst Sophie xx
I think the graduation bird should be name Fred! Love the birds! Loved them since Tim introduced them. Can't wait to get the Thinlets dies to cut them out and all of their accessories!
Oh Richelle -- fantastic makes. I have not gone bird crazy yet, but these cards and Tim's new products may put me over the edge. I love your coloring. Sam's card is my fave (but then again Ethel and Harriet are so cute!). I would suggest Rupert for the grad. Have a great day -- Mary Elizabeth
Thanks for the tutorial :) I love these birds <3
All cards are wonderful!!
Anja
You are having too much fun with birds, Richele! I love the bird crazy birds and I think Sheldon would be an appropriate name for the nameless bird.
Oh, that last guy? That's Sigmund.... haha
LOVE your cards, Richele! Fabulous coloring and I seriously adore all the fun scenes you've come up with. I haven't gone bird crazy yet either... but you make it seriously hard to resist! :)
Oh, how about Graduation Day for Gertie?! She looks like a Gertrude to me, and her friends call her Gertie :) :)
You've created such a wonderful collection of Crazy Bird cards, Richele!! Loving them all!!
XOXO-Shari
Richele, You put the biggest smile on my face with your Crazy Birds. What an imagination. I just love how you did your birds. Thanks for sharing.
Bogart the brainy bird. I cannoy wait to get my die cut and accessory stamps for the crazy birds.
Oh gosh.. You have been very busy. What a lot of fabulous cards. They are so cute and you made a great job coloring them.
The last bird could be named Einstein. Very clever guy.. Just like your graduated bird..,
Thank you for sharing ...
Hugs from Monica... Spain
love these creations and the way you have coloured them is wonderful x
Love your cards Richele. That Crazy grad looks like a Perpetua to me!
Keitha
Egbert!
So awesome Richele!! TFS (I love Egbert! so I go with Stephanie on that one!)
Fabulous collection of crazy birds. :-)
Oh my! I love every card! They are all fabutastic!
I love the techniques! The birds are adorable!
Love them all !! Thanx for showing......
Love these Crazy Birds, and everything that you can do with them! I did make a very early Christmas card, and found a Santa hat for two of the birds, but it was very fiddly, so am looking forward to getting my dressing up set for them (and the die-set that is to come!) Thanks for showing us how to do this, and your use of the Precision cutting plate has prompted me to get one! (Exactly what I need.) XX
Great cards and tutorial, I am anxiously awaiting my matching dies. I think the last little guy looks like a Floyd!
Love. Love. Love. What an amazing job! I have colored a flock of these over the past several months but haven't done anything with them yet. I just got the dies to cut them out and am waiting for the accessory stamps and dies to go with them. For a name I would go with Merle or Atticus. :)
This tutorial is great! Now my spritzer is on my table. I'd go with Georgie (girl or boy)! Called my brother Georgie all the time and still do. Love it!
A live in holland en love these thanks for showin
Love these!! You did such an amazing Job! The last birdie looks like an Edwin to me.
Fantastic. I just cannot wait to get my hands on a set of those dies
Oh my goodness, such cute cards and great job coloring (and naming the birds)! I couldn't resist these birdies any longer and mine should arrive tomorrow. Yay! Now I can be crazy about these funky & fun birds, too! I even have plans for Miss Ethel for a Christmas card (and she won't be wearing a hat) and I may change her name to Ernie, I hope that's alright. LOL : )
I love that everyone is so crazy over these birds. I have had mine a while and I have the dies ordered. Now I need the accessories. And I can't wait to see what Tim comes up with next. Oh, and I like the name Einstein for the graduating bird. Awesome sharing, I learned a lot from this.
Great cards! Very inspiring! I can't wait to get the new crazy bird products. I think the last bird is a Jimmy.
Love these! I vote for Sheldon.
I love your cards! I've been having fun giving my crazy birds accessories too. I don't have the accessories from Tim Holtz yet but I've found other stamp sets that work with the birds. I hadn't thought about using the spritzer thanks for the idea.
Love your cards! Love that you are naming the birds! I say the last one should be Iris as it is a lovely shad of purples. Thanks for sharing and inspiring!
Just love all your cards, thanks for all the tips. Can't wait to get the accessories and dies. How about Ollie for your grad birdy x
I do love your birds... great technique with the spritzer too... a must try 1 My spritzer skills are STILL developing LOL !
Name him " Eggbert " ( egghead ) :) <3
Loving your delightful feathered friends!
I hear voices when I'm making Bird Crazy cards ;) Sam for instance has a Mr. Bean like voice. Imagine him wishing you a HB :)
The last bird, I think he's a Fred.
Theodore the braniaic!!!
I love your cards and your wonderful coloring techniques. I too have names for these birds and find myself calling the grad, Petie Bird. I see several very cool name suggestions from other commenters. Have fun choosing.
He looks like an ARCHIE to me. Love these birds.
Oh my gosh, great tips for coloring these little guys! Thank you for sharing.
I vote for "Grady" for the graduate. Get it? GradY. I crack myself up sometimes.
I think he looks like an Arthur. He was an art major ya know.
I love your coloring. Love these birds too.
First thought was Sonny. Love your birds and tips.
Gorgeous colors!
Gorgeous colors!
He looks like a "Melvin" to me. Love your art Richele!!!
Gorgeous cards,I do especially love your Easter Bunnies! made me laugh :)
Nessa xxx
love your cards. I think the grad bird should be Montgomery!
These birds are just gorgeous!!! Thanks for the tutorial! Love the way you colour them, Richele. I think the last bird looks like a Henry, or Henrietta when dressed as a girl!
Thanks for the great technique video. Fantastic cards! I love that you named your birds and am anxious to see what you name the scholar.
I thought the last one looked like a Dora!!!
lovely images.
Kathleen Mc x
Fantastic cards, love those birds, my dies should be here tomorrow, think I need the hats now! xxx
Wonderful, wonderful, wonderful! I am thinking Rudy for the Graduate (and Christmas, etc.).
I want to get me some crazy birds! Frankie or Francis - could be a boy or girl. Love your coloring ideas, thanks.
Love..love..love! Great inspiration. I like all the names... I was thinking Einstein when I first saw him.
Love..love..love! Great inspiration. I like all the names... I was thinking Einstein when I first saw him.
These are wonderful. I think I'm in love. Thank you for the coloring tutorial.
I fell in love with the Crazy Birds the first time I saw them. Thank you for sharing your coloring techniques and giving each of the birds individual names. When I saw the graduate, I thought "Fred" but all the names are great.
Awesome cards, your colouring is wonderful, thanks for the tutorial, love the bird's names too! Cathy x
WOW!!!! You're AMAZING
I finally have all the parts to make my cards!BTW, I'm thinking Melvin should be his name.
I love the suggested names for The Graduate. But Bogart brought the biggest grin to my face. I absolutely love these crazy birds! Really appreciated ur demo! Thanks!
How did I go from loving Magnolia's Tilda and Edwin to Tim's Bird Crazy? I don't know.....BIG leap?
I love the suggested names for The Graduate. But Bogart brought the biggest grin to my face. I absolutely love these crazy birds! Really appreciated ur demo! Thanks!
How did I go from loving Magnolia's Tilda and Edwin to Tim's Bird Crazy? I don't know.....BIG leap?
I think he looks like a Stuart. Thanks for all the coloring technique help, I think the spritzing is the key
I just love these birds. He looks like an Albert to me.
And thanks for all the tips.
Love them how about Walter
Love them how about Walter
Wow, these are so adorable! I bought the birds but it has taken me forever to get the accessories, which makes them so much fun! I was wondering, do you remember the name of the tree stamp for the Christmas bird card? I love that one!
Hi Kate!
Thank you they are really fun. The tree stamp in the background is called Tree Line by Tim Holtz #CMS244 from Stampers Anonymous. Happy Stamping!
Love your cards! How did you do the graduation hat on him? I don't see a stamp like that in the crazy things set.
The graduation hat is on the Crazy Things Stamp set in the lower left corner along with the scroll. Have fun creating.
Great cards! I appreciate you sharing your techniques with us! You are very talented!
Post a Comment