
Hello friends! Are you loving the Halloween Inspiration series over on the Tim Holtz blog? The projects have been so AMAZING!!! Don't you think?

Today's project features embossing with ink on your Texture Fade, coloring Deco Sheets with Alcohol Inks and die cutting tricks to use on Thinlit dies to make your life easier.

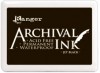
Rub the ink on to the Texture Fade directly from the ink pad. My favorite ink for this technique is Archival ink. The color comes out with good coverage and the color is smooth. Don't worry you can clean the Texture Fade later with stamp cleaner.

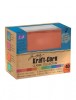
Once the Texture Fade is inked carefully insert a piece of Kraft-core cardstock in to the folder.

Run it through your machine to ink and emboss the image in one pass.

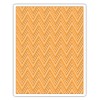
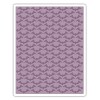
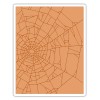
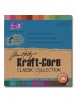
Love the contrast and how it shows off the embossed design! These are just a few of the new Tim Holtz Texture Fades embossing folder for 2015…the Zig Zag, Cobwebs and Batground. I think Batground is my favorite. Which one do you like?

When you're all done embossing just use a good stamp cleaner to clean off the ink. After I cleaned them I ran the folder through my machine one more time with a paper towel between the folder to clean out the last bit of cleaner.

Lightly sand the raised areas with a Sanding Grip and add stitching if desired around the edges.

Lightly sand the cards with a Sanding Grip.

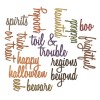
Choose a few words from the Thinlit Halloween Block letter set and cut them out from a 1" strip. Here's my sandwich working from the bottom…
1. Magnetic Platform
2. Precision Base Plate with the metal side up
3. Kraft-Core paper face up
4. Thinlit die cutting side down
5. a cutting pad on top.
Now that's a sandwich!!
TIPS FOR THINLIT DIES
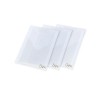
1. A sheet of wax paper between the paper and the die will help release the paper more readily.
2. For intricate dies it helps to run them through you machine a few times. (Back and forth)
3. Placing the die at the outer edges of the machine will give you better cutting power.
4. The Precision Base Plate also helps cut better with more intricate dies.

Once you have your strips cut lightly sand them with a Sanding Grip.

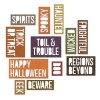
Add a contrasting color underneath (I used black and Deco Sheets) behind the die cutting strips. Cut the strips just under 1" wide and adhere them to the back of the die cut strips. Add stitching if desired.

Ink the edges of all the pieces. Adhere the embossed background pieces to your base cards.

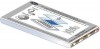
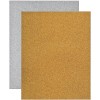
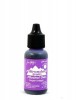
Deco Sheets are very versatile, they come in gold and silver and they have a sticky backing. For die cutting purposes adhere the deco sheet to a piece of cardstock. I like to use glossy cardstock but anything will work fine.

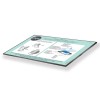
Storage can be an issue sometimes for these little dies. Add a magnetic sheet inside the storage envelope and your dies are safe and well organized.

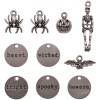
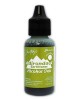
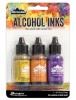
Die cut the words from the Deco Sheet then Alcohol ink them the color of your choice.

Assemble your cards as desired.

Love the combinations of Oddities Adornments!

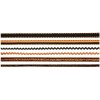
These Halloween Trimmings are to die for with the touch of metallic!

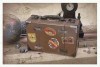
Haunted Halloween with the Zig Zag Texture Fade.

Beware Wicked with the Batground Texture Fade.

Trick or Treat with the Cobwebs background.
Thanks for joining me!
Richele
 |  |  |  |
 |  |  |  |
 |  |  |  |
 |  |  |  |
 |  |  |  |
 |  |  |  |
 |  |
21 comments:
Great tips Richele and your cards are amazing! I recently got some of the new stuff and I'm in Halloween mode.
Great tutorial!! These are so spooky cute!!! See ya in a couple weeks.
As always , fantastic project! Love all your cards, wonderful! Love this technique , I can't wait to try! Barbarayaya
Love the spider web card best! When I look at the bat folder I see apples before I see bats...go figure! lol
What great backgrounds! I've watercolored a folder and run it through the machine but never just inked up the folder. Love the look!
Very nice Halloween cards! LOVE the technique..thank you for sharing!
Very nice Halloween cards! LOVE the technique..thank you for sharing!
Great cards! So many details bring them to life. Love the inked deco. Thanks for the step out.
Cool cards. Spiderweb is my fave.
Love your Halloween cards Richele, they're awesome! Great technique, inking the folder first then run through the vagabond! Thanks for the great Halloween inspiration!
Love the cards!!!
So Cool !!!!
Neat cards. Love the technique (inking embossing folder) you used.
Love all of these spooky cards, Richele! The black archival ink in the embossing folders is wonderful. Great tutorial. Thanks, Paulette S.
http://paulettesprettypapercrafts dot wordpress dot com
since the blogger profile for a blog that no longer exists is still attached to my google account, has a closed email,etc... and no one at either company can delete or edit it...nor will allow me do so since it was ?froze when WordPress imported my blog.
Very creative. You are amazing and so inventive. Thank you for a wonderful tutorial and all the tips.
Great techniques for these spooktacular cards Richele! Julia xx
awesome cards!
Delightful cards so colorful and dynamic.
MOST EXCELLENT results with this technique, best I've seen. You must have a super juicy pad! These cards are super gorgeous!!!
What fun backgrounds! Thanks for shearing how to do this!
Fabulous Halloween cards, and you've achieved great results using that Adirondack ink on Texture Fades. Lots of great tips in your post; thank you for sharing...Now I need to add these folders to my list!
Thank you so much for the tutorial...Love the cards.....great ideas ...great directions for me to follow....LOVE it!
Post a Comment