
Hello Friends! I'm back with another post for the Tim Holtz Inspiration Series. The projects have been amazing!!!! How cute is this Holiday Knit Thinlits die set. I loved how Jan Hobbins used the die on her project yesterday!

The Holiday Knit Thinlits would be great for cards, or a special holiday layout, even a band around a present would be fun. Can't wait to play more with this die.

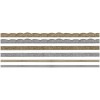
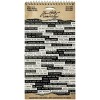
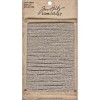
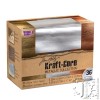
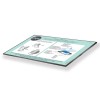
Die cut strips from Kraft-core cardstock using the Holiday Knit Framelits set. Thinlits are perfect for those intricate images, just look at how tiny these pieces are.

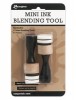
Carefully sand the pieces with a Sanding Grip then ink the edges with Distress Ink on an Ink Blending tool.

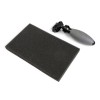
Apply a piece of felt or batting to a piece of paper with Glue Stick. The paper is just to keep it stable. Draw a line for lining up the edge of the Holiday Knit strips.

Add stitching around each strip then ink the edges with Distress Ink.

Sand card and mat with a Sanding Grip then add a little Distress Ink.

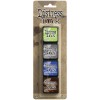
Choose a little message from Small Talk Occasions, sand the edges then add Distress Ink on an Ink Blending Tool. Small Talk Occasions has so many fun sayings to use on all kinds of projects.

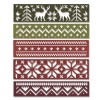
Love how the felt pops through the die cut and makes it look like a real sweater.

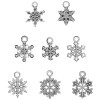
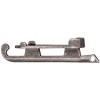
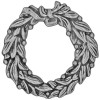
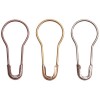
Tie Linen Ribbon around the card with a bow. Use a Loop Pin to add a Type Token and Wreath to the bow.

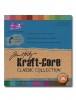
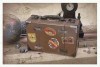
I also made a Metallic version of the card using Metallic Kraft-core.

You can create such cool effects using the Metallic Kraft-core.
Sand the cardstock in a circular motion to give it a brushed metal effect.
I also love how it looks when embossed with a Texture Fade The raised area stays shiny and the rest is more matte and every Texture Fade reacts a little different.
Thanks for stopping in!
Richele
 |  |  |  |
 |  |  |  |
 |  |  |  |
 |  |  |  |
 |  |
22 comments:
Love these! TFS Richele!
Oh how pretty ... love the stitching such a neat touch! And the metallic ... WOW ... so cool; love the metallic trims too !
Amazing card! I can't wait to play with these dies!!!! They're absolutely wonderful!! Stunning work as always! Barbarayaya
I was reading through your tutorial and then I got to the metallic card and STOPPED, DROPPED and GASPED! WOW! :)
Great cards, but the metallic one is fabulous!
Beautiful/. Love it.
I see fabulous sweater ideas for knitters!
Oh how lovely are these cards! What a different look with the second one!
It is a great set of dies (that I now wish I had...), the metallic one is stunning but I do love the traditional red and green, it reminds me of a sweater my Mum made years ago ! They are both beautiful cards. x
Both cards are gorgeous Richelle! I love the felt and stitching on the first card then, the metallic colors on the second card…wow! Awesome Holiday inspiration, thanks! xx
Wowww. gorgeous Richele! Thank you so much for the awesome Tutorial!
Ellen xx
Beautiful cards.
Gorgeous textured effects.
Alison x
I love this - it feels like I am all wrapped up in a warm cozy Christmas!
Sandy xx
Well I meant to say Christmas Sweater!!
Wonderful cards! I love them both!
What a clever idea using the batting!
Fabulous tutorial, thanks so much for sharing. Love both of your cards!
Stunning cards! I LOVE the metallic one!
OOOH Richelle these are gorgeous!! You could frame them!
Love adding the felt behind the die cuts Richele ,what a brilliant idea! Thanks for sharing your beautiful cards, Deb xo
I made a version of the red and green card for Christmas 2015. I want to go back and try the metallic version to put away for 2016. thanks as always for the inspiration.
Post a Comment