
Hi friends! I love to alter things and what better way then to use power tools.Todays tutorial is all about lighting up the Tim Holtz Skulls with the new Halloween Tiny Lights.

Just by adding a few holes in the Skull you can make Mr. Cranium light up.
I will be using a drill but a Dremel would work as well! Please follow all manufacturers instructions and always be carefully when using power tools.

First I chose a bit size that would fit in to the eye socket. Then I drilled out the eyes angling towards the center of the skull!

Now drill up from the bottom, I sized up this bit to get a larger hole so there's a little more room for the lights.

Use a small brush to color inside the eye sockets, I used Mushroom Alcohol Ink but any brownish grayish will work fine.

If your going to stack the skull on top of something (a pumpkin) or place it in something that has a base (a dome) you will have to drill that as well. Carefully fold the light and thread through your stack being VERY careful not to over work the wires of the lights. They can break! I know this from experience, so just be gentle. Thread the lights independently and then adhere the stack staring from the top (the skull) and work down. TIP: I always work with the light on so I know they are working properly and it's fun to see it all come together.
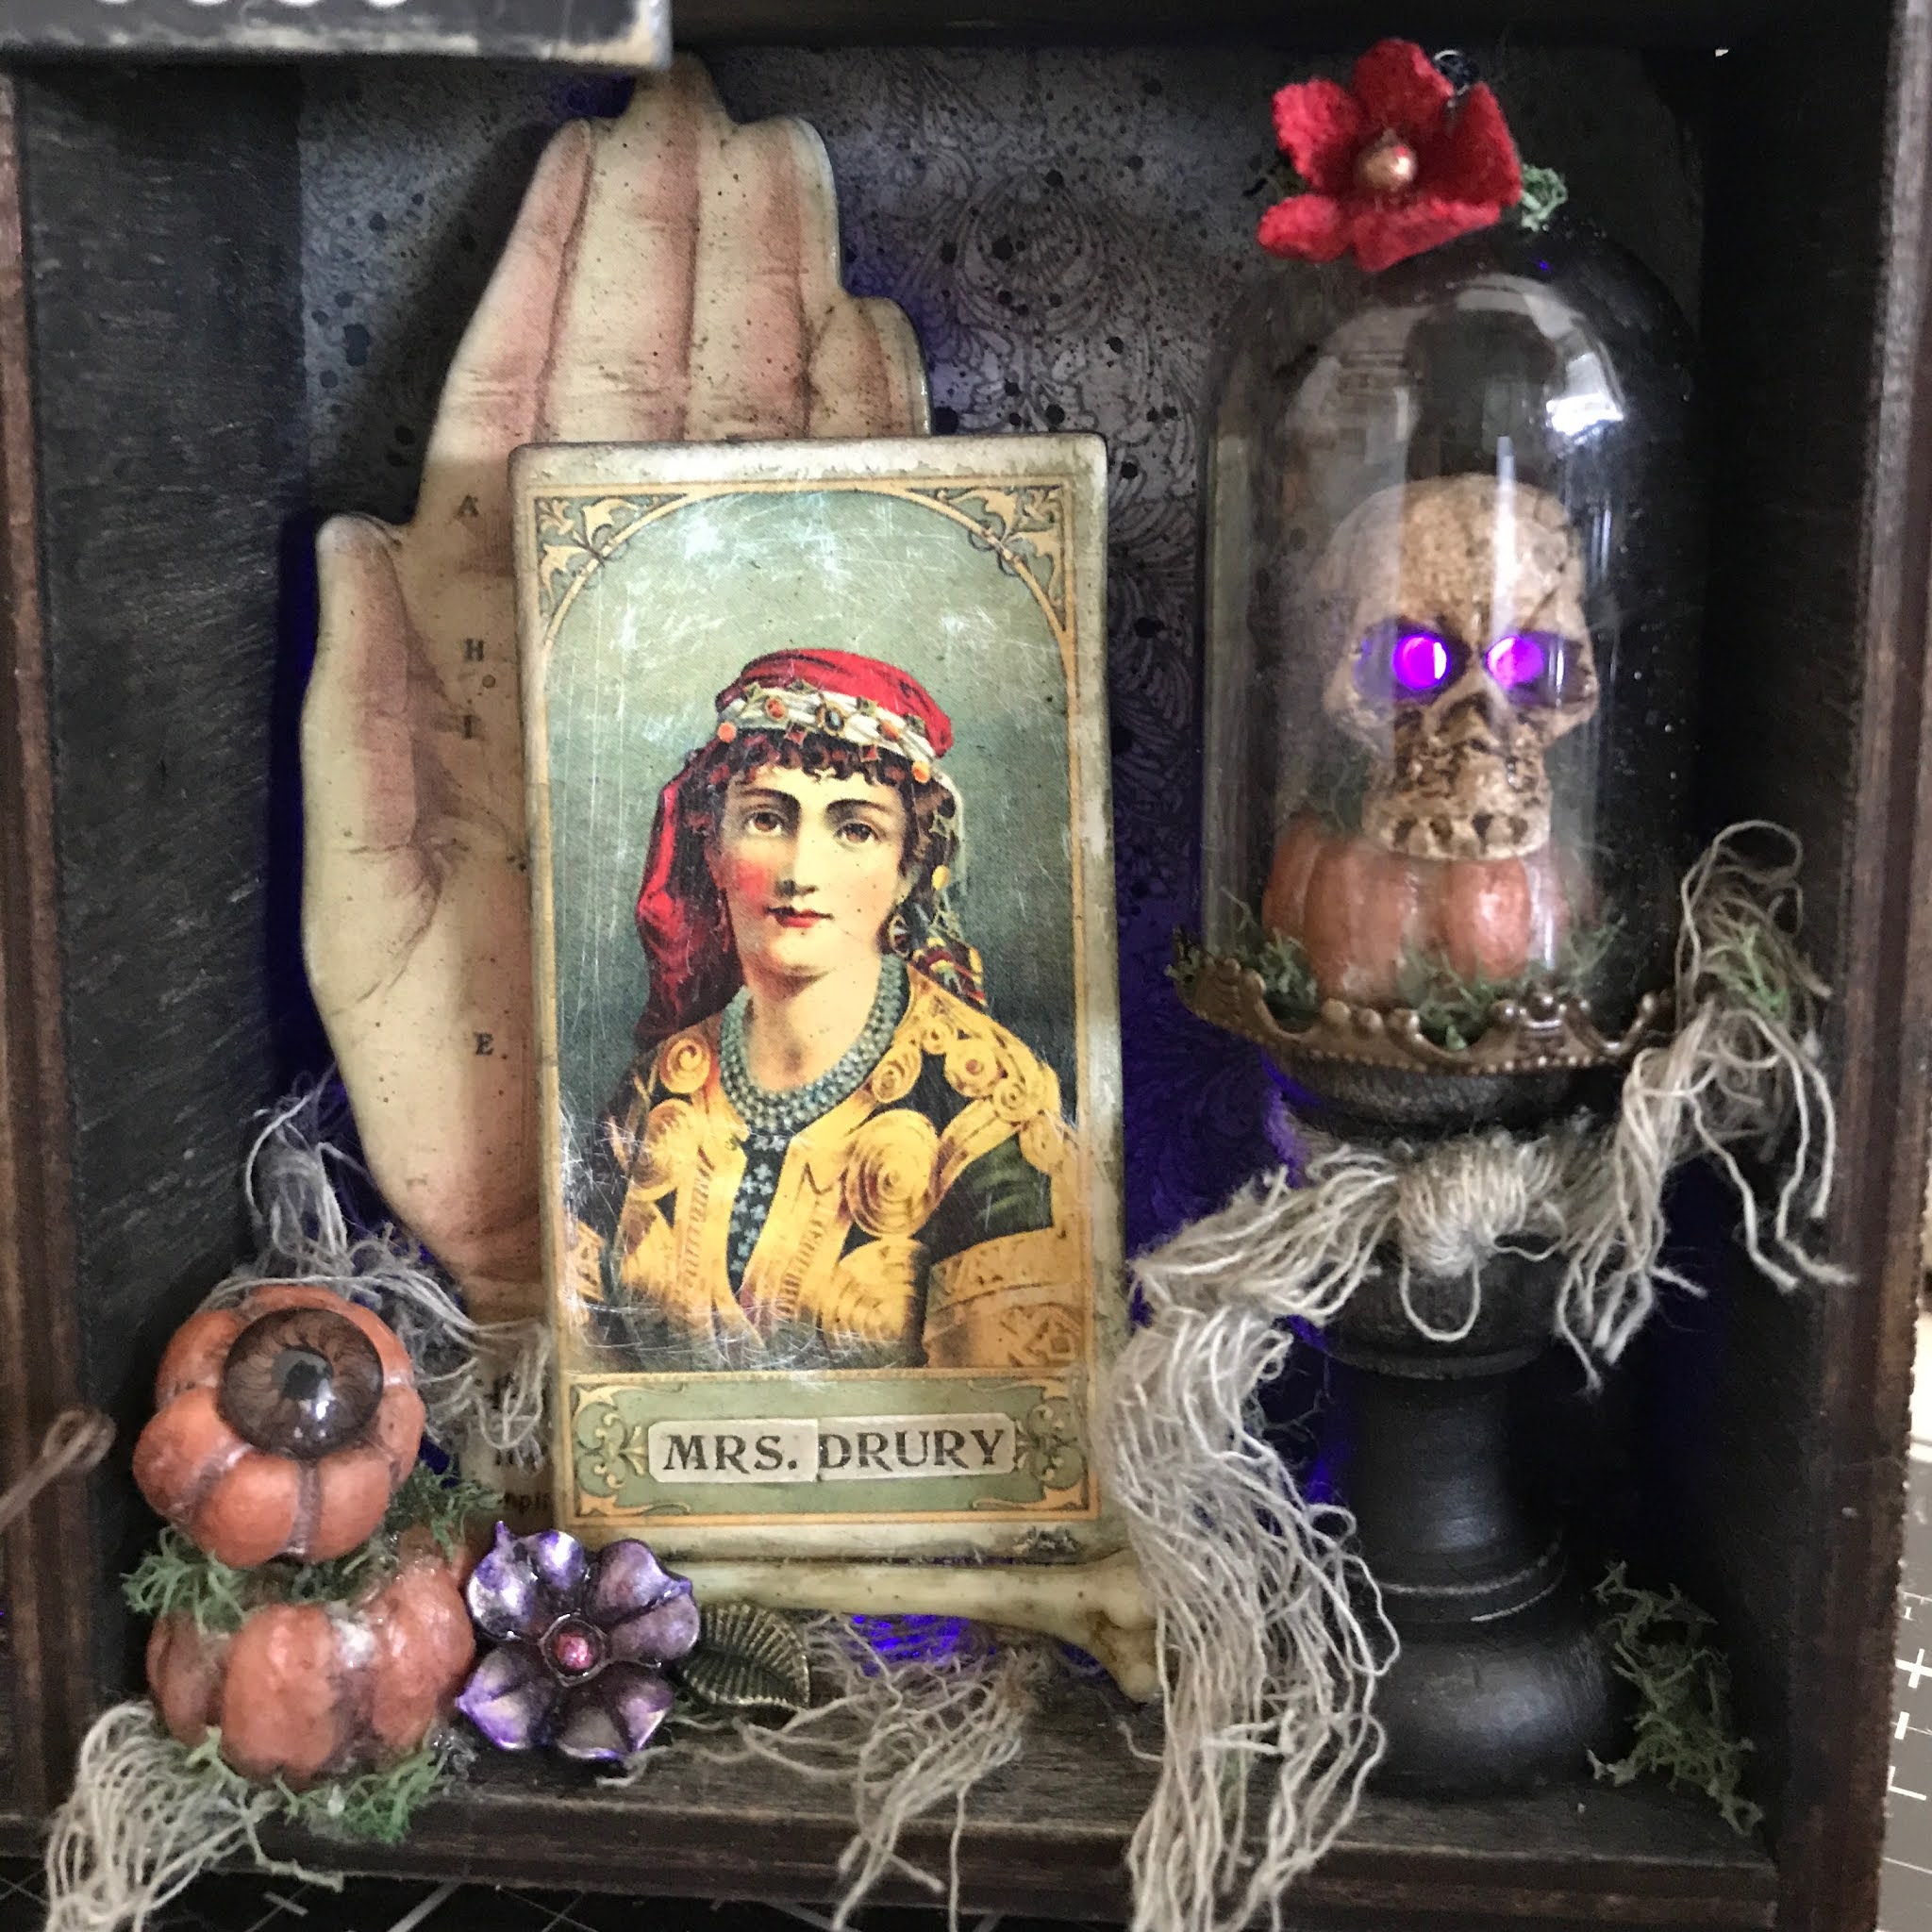
I have always loved using lights, it brings your creativity to the next level.
Try lighting up your next project.
Thanks for stopping by!
Richele
Check your local store or click on the link below to head over to Simon Says Stamp.

1 comment:
YES, thank you for the directions and special tips...I will definitely be giving this a go...just waiting, waiting, waiting on my goodies to arrive...fingers drumming, foot tapping...LOL...
Post a Comment