Hi friends! Thank you all for stopping by my blog today I'm so happy you're here. Today I'm sharing a few ways to alter the Mini Mason Jars for gifts, a home decor piece or something fun to hold your favorite photo for the holidays. The post is a little long so grab a cup of coffee or tea and enjoy!


The first Mini Mason Jar is perfect for a quick gift for the kids or in my case the Grandkids!

Wash all pieces of the Mini Mason Jar before you start.
Paint lid with Evergreen Bough Distress Paint and let dry.

Stamp Holiday Postmark of your choice on Christmas Paper Stash with Archival Ink.

Punch out postmark with Tim Holtz/Sizzix 1 1/4" hole punch.

Fit punched paper into ring and place in Tag Press and press. See Tim's video on the Tag Press here.

Once you've press the ring punch a small hole at the top of the ring to add a string later.

Die cut a couple circles from Stitched Circles to fit the top of the lid. Also die cut the mug from the Mini Christmas Things. I used the new Sidekick for die cutting today. Super handy and oh so cute. Use scissors to cut off the steam on the red cup.

Ink the edges of the circles and mug using Distress Ink on a Mini Ink Blending Tool.

Adhere the mug together with Distress Collage Medium. Add the mug and the small circle with foam tape to create a little dimension. Adhere the plaid circle directly to the lid with Collage Medium.

Alcohol ink the Metallic ribbon, apply Alcohol Ink to applicator tool, place on ribbon and pull ribbon to color.

Tie a bow around the top of the jar adding the snowflake, use a small piece of string to tie the post mark tag to the bow.
Fill the jar with hot cocoa mix and mini marshmallows.
The kids are going to love it!

This Mini Mason Jar decor piece has an elegant look but can also be made in traditional colors.

Spray trees with Distress Mica Spray in Tarnished Brass.

Apply Distress Collage Medium to the tree using your finger.

Pour Vintage Platinum Distress Glitter Dust over trees and shack off excess glitter, set aside to dry.

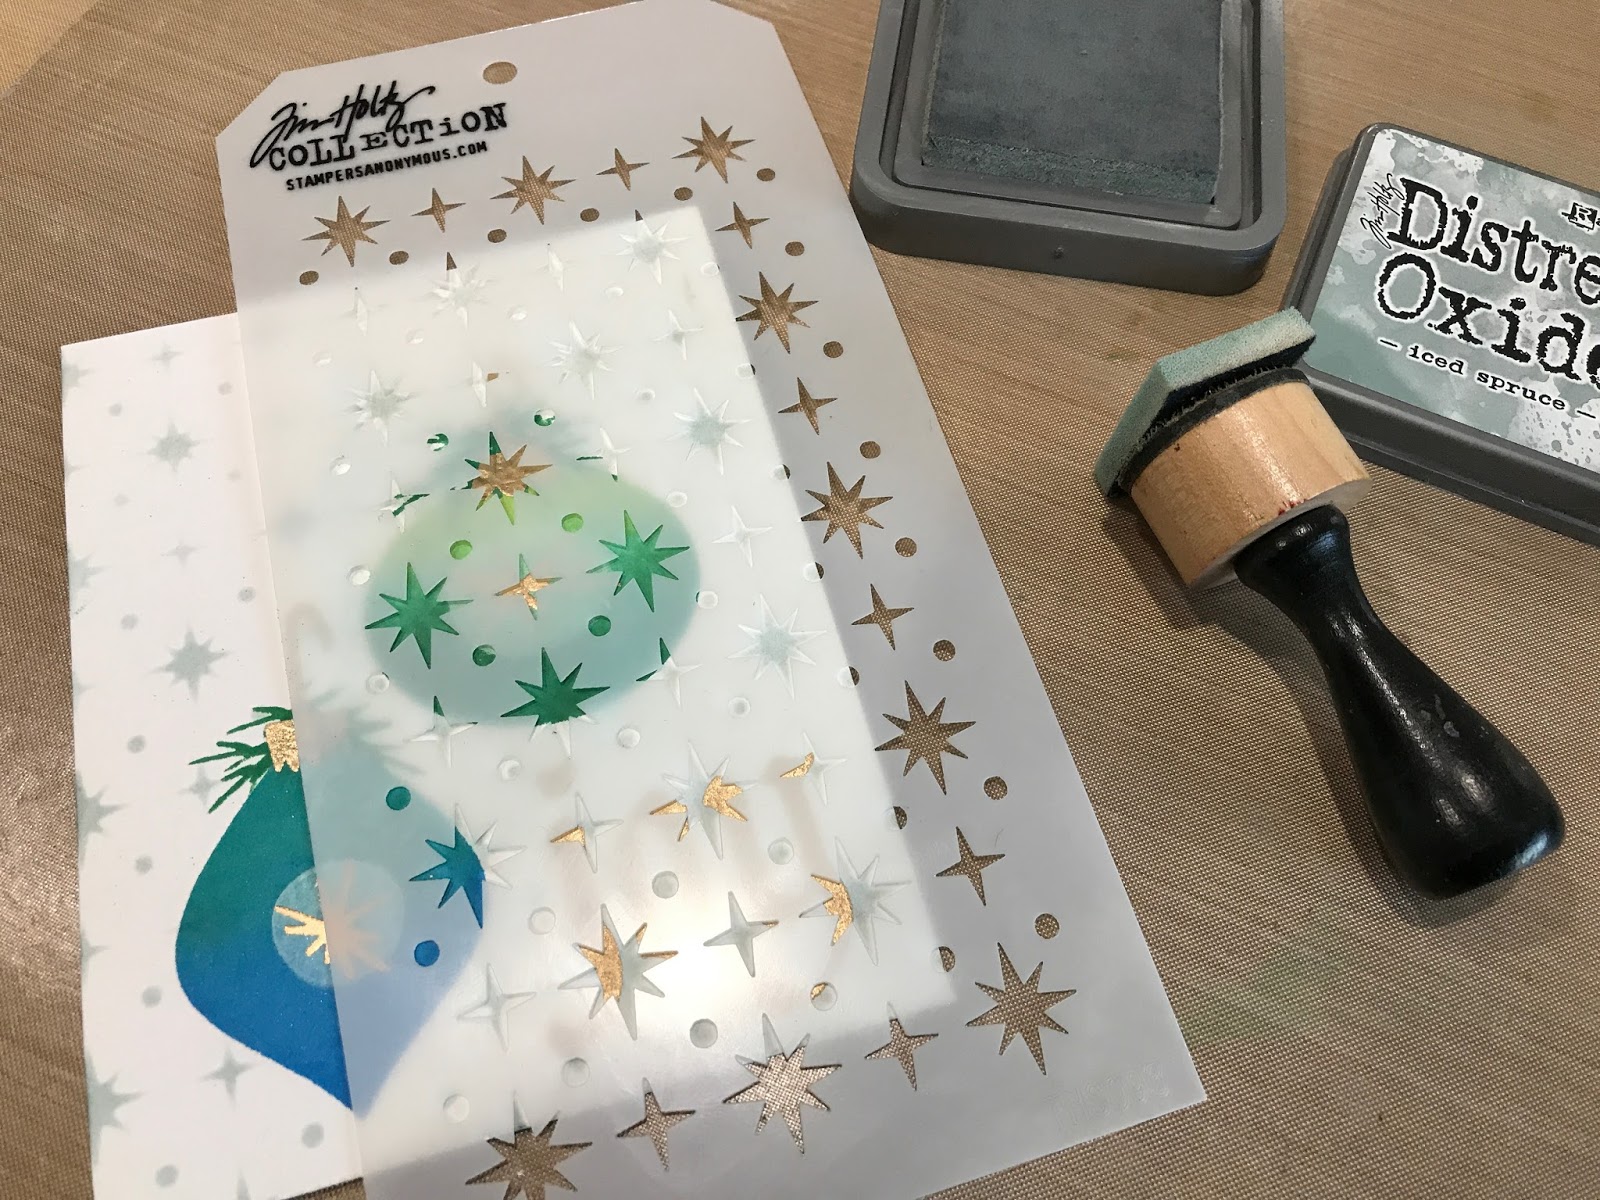
Apply Gold Metallic Mixative and a few drops of Blending Solution to cotton swab and rub over deer to color.

Cut a circle to fit in the bottom of the Mini Mason Jar. (Approximately 1 1/2") The circle is for a base to adhere everything to and will not show.

Adhere the deer to the circle using hot glue.

Cut the base off the trees and adhere the trees with hot glue. The trees should not overhang the circle to much or they won't fit in the jar.

Apply a generous amount of Collage medium to the bottom of the circle.

lower the unit into the jar to adhere to the bottom and let dry.

Add Distress Rock Candy Glitter to the Mini Mason Jar for snow.

Apply Gold Metallic Mixative to the lid, Curio Knob, Pine Cones and Christmas Word Band. I used the lid from the Photo Clip Kit or you can drill your own hole.

Punch greenery out with the Holly and Juniper Punch. Alcohol ink the greens withGold Metallic Mixative on an Applicator Tool.
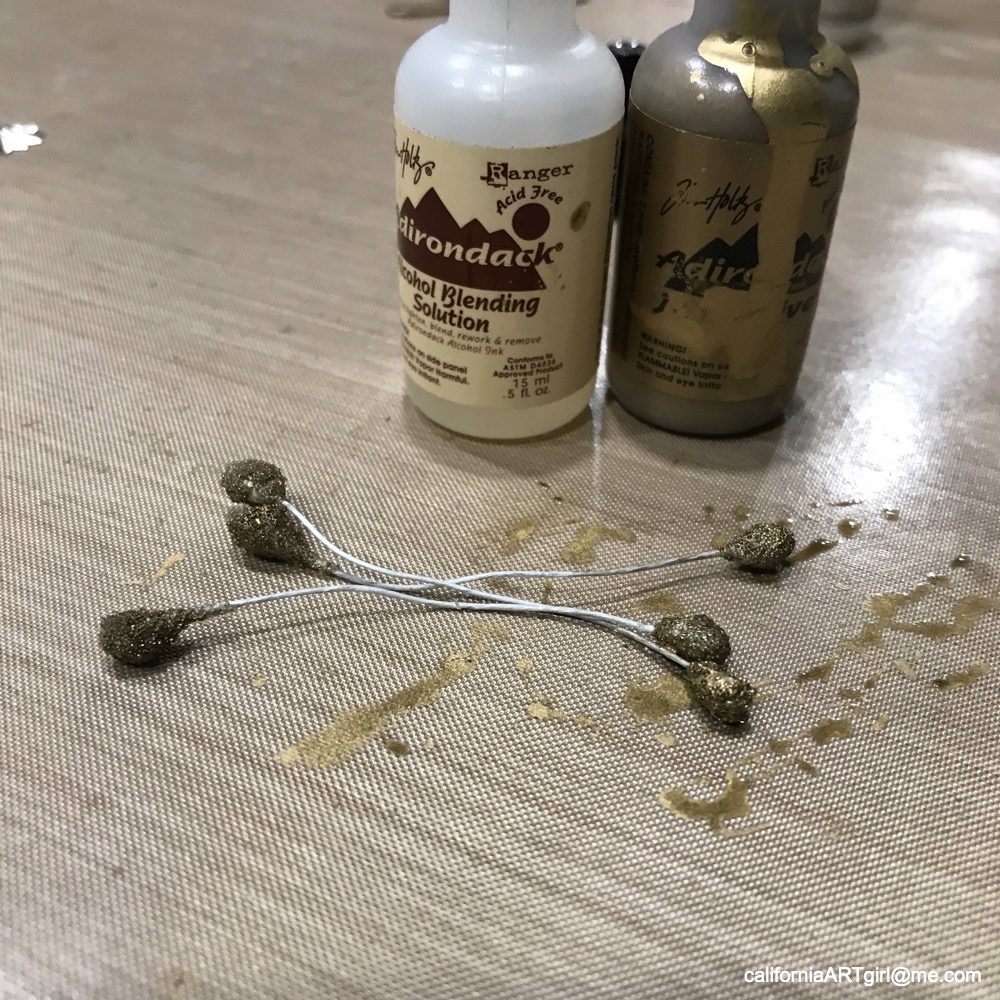
Apply Gold Metallic Mixative to the Beaded Berries to color gold.

Bend the Word Band to fit the curve of the jar using jewelry pliers. Apply Black Soot Distress Crayon to the Word Band. It's helpful to heat up the Word Band before you add the Crayon.

Rub off with a soft cloth and the Crayon will remain in the words.

Adhere the greenery around the center hole with Distress Collage Medium. Attach Curio Knob to lid. Tie Metallic Ribbon around Curio Knob attaching Pine Cones and Bells with a bow.

Thread the ribbon through the Word Band, add a small piece of foam tape to the back of the band and tie around the bottom of the jar.

Adding the Photo Clip Kit to the Mini Mason Jar and adding a photo or ephemera can be fun too.

Create a collage with Ephemera, Paper Dolls and even a tree.

Embellish lid with Distress Paint, Fringe, Typed Token and Christmas Jute String.
Attach collage to Photo Clip, add candy to the Mini Mason Jar and your all set.
I hope you will try a few Mini Mason Jars this season!
Thanks for stopping in!
Richele