Showing posts with label Alcohol Inks. Show all posts

Wednesday, August 22, 2018

Sense of Wonder Fall Card - Stampers Anonymous fall release

Hello friends! The weather here has been so warm lately and I'm so looking forward to fall and cooler days. I love fall, it's my favorite time of year! My card today features the new Stampers Anonymous Nature's Wonder stamp set by Tim Holtz and the new Ranger Lift Ink. 

Love the textures on this card created by the stamping in the background, the ribbon, flowers and leaves.

Cut Watercolor cardstock for the background of your card, positions stamps over background and pick up stamps with a block. 

Drip Alcohol Inks on a piece of Yupo paper. 

Add Blending Solution to to felt pad and punch over the surface to blend inks. 

Ink stamp with Lift Ink and stamp leaves on to Yupo background then stamp the lifted ink on to Watercolor Cardstock. Blot off the image on the Yupo then buff off the extra ink with a soft cloth. 

Apply Distress Markers directly to Media Mat, pick up ink with waterbrush and color leaves. The Lift Ink is waterproof and will not run. Dry with a heat tool. 

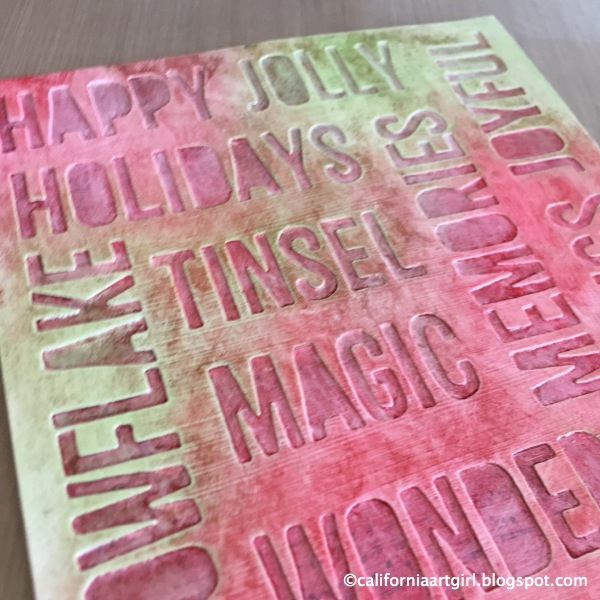
Apply Distress Micro Glaze to the leaves.The Distress Micro Glaze will act as a resist so the leaves will not take the ink. Stamp background with Craze stamp using Old Paper Distress Ink, add Distress Ink to the background using a blending tool and spray background with Distress Mica Spray in Tarnished Brass. I also flicked the Mica Spray over the background to create some spots. Blot of leaves as necessary. 

Spray ribbon and flowers with Distress Spray Stain and Distress Mica Spray, add a little water to help the ink spread, dry with a heat tool scrunching ribbon as it dries. 

Cut out leaves from Yupo paper with scissors. 

Carefully heat the Yupo leaves with a heat tool, using tweezers shape the leaves as they become pliable to create dimension. 

Create mat a little larger then background with rust cardstock, add stitching as desired. Assemble card adding Textured Surfaces and vintage dictionary print on base card. 

Tie ribbon around card with a bow, add flowers and leaves adhering them with Distress Collage Medium and foam tape. 

Stamp message with Archival Ink cut close to words and add to Ornate Plate. Adhere Ornate Plate to card with foam tape over the Wood Plank. 

Love the colors of the leaves that signify the changing of the season. 

Thanks for stopping in! 
Richele

Click on the link below to head over to Simon Says Stamp!

Wednesday, October 21, 2015

Tim Holtz Inspiration Series - Joy Burlap Panel

Hello friends! I am in love with the technique from the Tim Holtz 12 Tags in August. You can check out the full tutorial over on Tim's blog! Tim's tutorial has lots of step photos. So please check it out! 

The technique is fun and I think the results are AMAZING! 

Cut a piece of Manila Cardstock about 1/2" smaller then the Burlap Panel. Die cut the words using the Thinlits dies with the Holiday #2 Block Words. It's a good idea to tape them down using Post it Note Tape or Tissue Tape. 

You will need to run the cardstock through 2 times to get enough words die cut. 

Adhere a piece of Yuletide Paper Stash behind the Manila using Multi Medium. Apply a layer of Multi Medium over the top and let dry. Once that's dry apply a thin layer of Gesso over the entire surface and with a paper towel wipe off the the gesso in the words and let dry.  

Apply Distress Ink directly to the surface. I ended up using Festive Berries, Mowed Lawn and a little Frayed Burlap Distress Ink. Using the Mini Distress Ink Pads work perfect for this because they are little. Apply a layer of Multi Medium over the top of the ink.  I found it helpful to wipe off my brush so the red didn't contaminate the green and vice versa.  

Use a paper towel with a light touch to blend the colors. If you're too heavy handed you will wipe the ink right off.

Tuesday, September 22, 2015

Halloween Inspiration Series: Spooky Cards

Hello friends! Are you loving the Halloween Inspiration series over on the Tim Holtz blog? The projects have been so AMAZING!!! Don't you think? 

Today's project features embossing with ink on your Texture Fade, coloring Deco Sheets with Alcohol Inks and die cutting tricks to use on Thinlit dies to make your life easier. 

Rub the ink on to the Texture Fade directly from the ink pad. My favorite ink for this technique is Archival ink. The color comes out with good coverage and the color is smooth. Don't worry you can clean the Texture Fade later with stamp cleaner. 

Once the Texture Fade is inked carefully insert a piece of Kraft-core cardstock in to the folder. 


Run it through your machine to ink and emboss the image in one pass. 


Love the contrast and how it shows off the embossed design! These are just a few of the new Tim Holtz Texture Fades embossing folder for 2015…the Zig Zag, Cobwebs and Batground. I think Batground is my favorite. Which one do you like? 

Tuesday, September 1, 2015

September 12 Tags of 2015

Hello friends! It was so nice to get up this morning to such awesome inspiration with the new September tag from Tim Holtz! It's hard to believe it's even September already.


You can see the full tutorial on how to make this beautiful tag over on Tim's blog

Here's my tag. 
Love how the stenciled image shows with the Archival ink rubbed on it. 

Here's the before and after comparison. 

The splatter in the background with the Distress Spritzer adds just the right amount of texture. 

The Frosted butterflies add the perfect dimension! 

I hope you will join in and make the September 12 Tags of 2015. I can't tell you how much FUN i'm having. It's like a recharge!! 

Have an AWESOME day! 
Richele

Thursday, April 17, 2014

Seaside Cards with Faded Layers

Hello friends…. Hope your week is going well! 
I'm very excited to be over on the Simon Says Stamp blog today with this awesome technique from the Tim Holtz Creative Chemistry 102 class called Faded Layers. The Creative Chemistry Class series is a great way to learn lots of techniques for all your Tim Holtz products. 

Here is a peek at the background I made for my cards. 

Head ove for the full tutorial on Simon Says Stamp Blog

Don't for get to leave a comment on yesterdays post for a chance to WIN a set of the new Mini Distress Inks! 

Have the best day ever. Thanks so much for stopping by! 
Richele