Monday, November 16, 2015

12 Tags of 2015 / Holiday Card Series - April Inspiration

Hello friends! I hope you all had a fantastic weekend and you set aside some time to get creative. I spent most of the weekend in my studio creating Holiday cards but most of the weekend was spent organizing my craft room. More on that another day as I'm still working on it. Still lots to do!! 

I'm so excited to start a new series here on my blog. I'll be using the 12 Tags of 2015 from Tim Holtz for the inspiration to make Holiday cards!! There are so many GREAT techniques in the 12 Tags of 2015 so I hope you will join me in creating some beautify cards and learn amazing techniques form the master himself, Tim Holtz. 
Here's how it will work, I will post my cards with the link back to Tim's blog so you can see the full tutorial. The bonus is that I will have several cards by the end of the series to send to my family and friends.

Here's the first cards for 12 Tags of 2015 / Holiday Card Series. 
I ended up making 2 cards…I wasn't sure the first one looked Christmassy enough for me. So I tried the Poinsettia Blueprint Stamp and I really like the way it turned out. The background technique is so easy and the effect is a pretty soft background.

Here is the link to the full tutorial on Tim's blog

Card #1
Card one…Chrysanthemum
 Distress Markers 
Background: Iced Spruce and Hickory Smoke
Flower: Festive Berry
Stem: Mowed Lawn and Twisted Citron


Card #2
Card two…Poinsettia
Distress Markers
Background: Iced Spruce and Hickory Smoke
Flower: Festive Berry, Aged Mahogany and Fossilized Amber
Stem: Mowed Lawn and Evergreen Bough


Which card is your favorite?
Chrysanthemum or Poinsettia

I'll be back in a few days with another card to inspire you! 
Thanks for stopping in!
Richele

Here's all the good stuff to create the cards...

Friday, November 13, 2015

Eclectic Elements - Backpack

Hello friends! Have you heard about the 
Tim Holtz Creative Journey Block Challenge with Eclectic Elements Fabric? There is lots of prizes…even a Bernina sewing machine. WOW! 


Join in and create your very own 12" x 12" quilt block using Tim Holtz Eclectic Elements fabric inspired by your creative journey.

Now through January 11, 2016, post on the Make It Coats Facebook page your 12" x 12" block made from Tim Holtz's fabric. Be sure to hashtag your block with #TimHoltzEclecticElements & #BerninaUSA to be entered.

Tim and a team of experts will select their favorite blocks which will be sewn into a quilt and featured at the Spring International Quilt Market in Salt Lake City May 2016. The best part is, your block could win one of our 24 fantastic prizes which include a Bernina sewing machine and yards of
Tim Holtz Eclectic Elements fabric!

Rules:
Quilt block must consist of approximately 95%
Tim Holtz Eclectic Elements fabric
Block must be 12" x 12."
Block must be posted to the Make it Coats Facebook page HERE on or before 1/11/16 for consideration. >
Contest is open from 11th November 2015 until 11th January 2016. Winners will be announced after 22nd January 2016.

As you all know I love to sew and Quilt Market was just a few weeks ago. I will be posting all the projects I made in the next couple of weeks. 
Backpack for Fall Quilt Market 2015
Tim Holtz Eclectic Elements Fabric 
Main fabric: Entomology
Accent fabric: Diamonds
Linning: French Script
Pattern: Simplicity #1388
The pattern includes a few styles of backpacks and a messenger bag. 

The pattern was pretty easy to follow. I did altered the pattern slightly by omitting the front pocket and adding the front band with contrasting fabric, hardware and the metal closure. 

The pouch pocket on the side can hold lots of goodies. 

The #6 patch on the flap is a fun detail that adds interest and the bugs are fun! I think my 10 year old Grandson would love this! 

Adjustable straps were added for a comfortable fit. There's even a loop at the top to hang up the backpack when not in use.  

A drawstring closure around the top helps keep all your items safe. 

I've been working on a new Christmas Card series for my blog and it all starts Monday! I hope you will join in on the FUN…..you won't want to miss it! 

Thanks for stopping in!
Richele

Wednesday, October 21, 2015

Tim Holtz Inspiration Series - Joy Burlap Panel

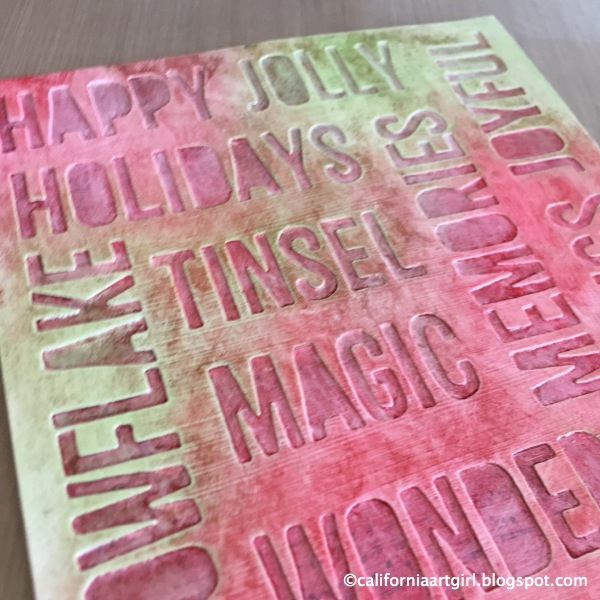
Hello friends! I am in love with the technique from the Tim Holtz 12 Tags in August. You can check out the full tutorial over on Tim's blog! Tim's tutorial has lots of step photos. So please check it out! 

The technique is fun and I think the results are AMAZING! 

Cut a piece of Manila Cardstock about 1/2" smaller then the Burlap Panel. Die cut the words using the Thinlits dies with the Holiday #2 Block Words. It's a good idea to tape them down using Post it Note Tape or Tissue Tape. 

You will need to run the cardstock through 2 times to get enough words die cut. 

Adhere a piece of Yuletide Paper Stash behind the Manila using Multi Medium. Apply a layer of Multi Medium over the top and let dry. Once that's dry apply a thin layer of Gesso over the entire surface and with a paper towel wipe off the the gesso in the words and let dry.  

Apply Distress Ink directly to the surface. I ended up using Festive Berries, Mowed Lawn and a little Frayed Burlap Distress Ink. Using the Mini Distress Ink Pads work perfect for this because they are little. Apply a layer of Multi Medium over the top of the ink.  I found it helpful to wipe off my brush so the red didn't contaminate the green and vice versa.  

Use a paper towel with a light touch to blend the colors. If you're too heavy handed you will wipe the ink right off.